Categories
Rangefinders

Bushnell Tour V7 Shift Rangefinder Review

Explained

Bushnell Tour V7 Shift Rangefinder Review

The Tour V7 Shift is Bushnell's fastest rangefinder yet, adding a dual-colour OLED display and optional launch-monitor-linked club recommendations on top of the accuracy and target lock-on the brand has been trusted for on Tour for years.

It sits above the Tour V6 Shift and below the flagship Pro X3+, and after digging through independent testing and hands-on reviews from across the golf media, the picture that emerges is consistent: this is one of the best rangefinders you can buy at this price, with a couple of genuine trade-offs worth knowing before you spend £399.

In this article
  • Bushnell's fastest and most accurate rangefinder in the Tour V line to date
  • New dual-colour OLED display separates actual and slope-adjusted yardage at a glance
  • USGA-conforming slope switch keeps it legal for tournament play
  • LINK-enabled club recommendations only work with a compatible Foresight or Bushnell launch monitor
At a Glance

What You Need to Know

  • Independent accuracy testing puts it inside Bushnell’s ±1 yard claim with the tightest deviation of any current Bushnell model tested.
  • The dual-colour OLED display is the standout upgrade over the Tour V6 Shift, showing actual (red) and slope-adjusted (green) yardage simultaneously.
  • It uses a replaceable CR2 battery rather than USB-C charging, which cuts both ways depending on what you’re used to.
  • The LINK-enabled club recommendation feature is genuinely useful, but only if you already have access to a compatible Foresight or Bushnell launch monitor.
8.8
10
Accuracy 9.5
Speed 9.5
Display & Usability 9.0
Build & Durability 8.5
Value for Money 7.5

Bushnell Tour V7 Shift Laser Rangefinder
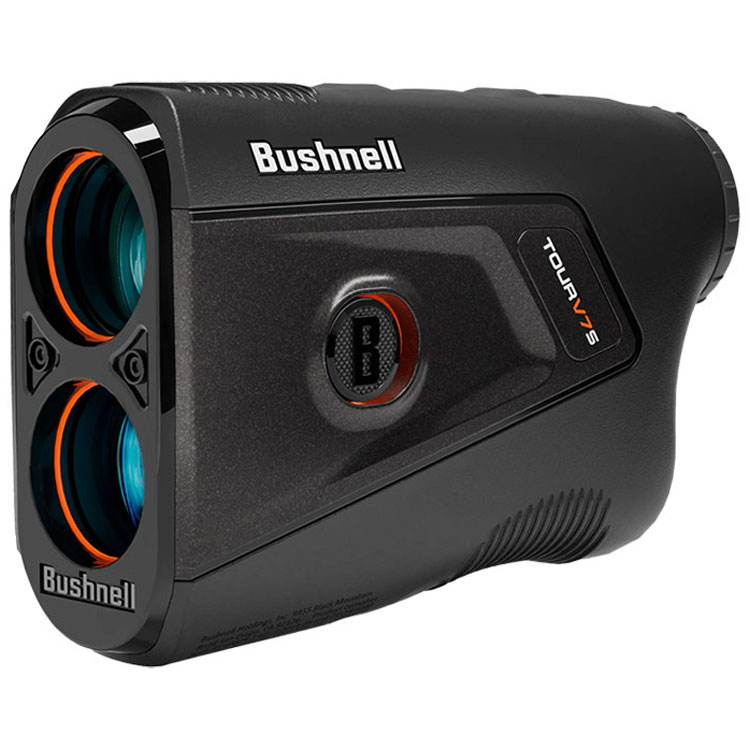
Bushnell's fastest, most advanced Tour V rangefinder

Bushnell Tour V7 Shift Laser Golf Rangefinder Black

€465.14
in stock
Clubhousegolf.co.uk

How it performs

Speed is the first thing every tester mentions. Bushnell built its reputation on fast, confident target lock-on, and reviewers consistently describe the V7 Shift as the quickest rangefinder the company has made: pull the trigger, let go, and the number is already there. PinSeeker with Visual JOLT does the job it’s always done, filtering out trees and bunkers behind the flag so you’re not second-guessing which object you actually ranged.

Accuracy testing backs up the reputation. Independent testing that compared the V7 Shift against a calibrated reference unit found it landed closer to true distance than Bushnell’s own Hybrid and A1-Slope models in the same test, with every reading well inside the advertised ±1 yard tolerance. That’s a genuinely strong result rather than marketing copy.

The dual-colour OLED display is the real news here. Previous Tour V models showed one number at a time; the V7 Shift shows actual distance in red and the slope-adjusted “plays as” yardage in green, simultaneously, in the same eyepiece. Multiple testers single this out as the most noticeable practical upgrade over the V6 Shift, particularly in changing light where a single-colour display can be harder to read quickly.

The LINK-enabled club recommendation feature is the headline marketing point, and it does what it promises: pair the rangefinder with the Bushnell Golf app and a Foresight or Bushnell launch monitor, run a MyBag assessment, and your personalised “play as” club suggestion appears right in the display alongside the yardage. The catch, which most reviews are upfront about, is that this only works if you already have access to a compatible launch monitor. Without one, you’re paying a premium price for what is, at its core, a very good laser rangefinder with a nicer screen, which is still a fair trade for a lot of golfers, just not the one Bushnell’s marketing leads with.

Key specs

Bushnell Tour V7 Shift Specifications

Up to 1,300 yards (flag-lock range shorter in practice)
Range
± 1 yard
Accuracy
6x
Magnification
Dual-colour OLED (red = actual, green = slope-adjusted)
Display
Slope First Technology, USGA-conforming physical switch
Slope
CR2 replaceable (included)
Battery
BITE magnetic cart mount
Mount
LINK-enabled, Bluetooth pairing with Bushnell Golf app
Connectivity
2-year limited warranty
Warranty
Rangefinder, hard-shell case with carabiner, microfibre cloth, quick start guide, CR2 battery
In the box
Best for
Golfers who want Bushnell's fastest, most accurate current rangefinder Anyone upgrading from a slow or unreliable budget rangefinder Competitive golfers who need a tournament-legal slope switch
Not for
Golfers who specifically want a rechargeable battery over CR2 Buyers on a tighter budget who won't miss the dual-colour display or LINK features
Pros
  • Fastest and most accurate Bushnell rangefinder tested to date
  • Dual-colour OLED display makes actual vs slope-adjusted yardage instantly clear
  • USGA-conforming slope switch keeps it legal to use in competition
  • Strong BITE magnetic mount and a genuinely premium carrying case
  • PinSeeker and JOLT lock-on remain the best in the category
Cons
  • CR2 replaceable battery rather than USB-C rechargeable, which some rivals now offer
  • LINK club recommendations need a compatible Foresight or Bushnell launch monitor most golfers won’t own
  • Premium price sits well above the Tour V6 Shift for a meaningful but incremental accuracy gain
  • Display can feel busy with MyBag club recommendations switched on

Where it sits in Bushnell’s rangefinder range

The Tour V7 Shift isn’t a standalone model, it’s the middle of a wider Bushnell lineup, and which one actually suits you depends more on budget and features than raw accuracy. Independent testing found very little real-world difference in accuracy across the current range.

  • Tour V5 Slim Shift: the budget entry point into Bushnell’s Shift line, smaller and simpler, without the dual-colour display.
  • Tour V6 Shift: the previous flagship, still excellent, and noticeably cheaper now that the V7 Shift has replaced it at the top.
  • Tour V7 Shift: covered in this review. Fastest lock-on, dual-colour display, optional LINK club recommendations.
  • Tour Hybrid: adds built-in GPS for front/middle/back green yardages alongside the laser, at a higher price.
  • Pro X3+: Bushnell’s flagship, with a longer effective range and premium build, at a significant step up in price.

If the dual-colour display and outright speed matter to you, the V7 Shift is the one to get. If you don’t have a Foresight or Bushnell launch monitor and don’t plan to get one, the V6 Shift gets you extremely close for less money. For the wider field, including Garmin, Shot Scope and Nikon, our rangefinder buying guide breaks down how they compare.

Want to Spend Less? The V5 Slim Shift Is Worth a Look

An older, cheaper Bushnell rangefinder

If €460 is more than you want to spend, the Bushnell Tour V5 Slim Shift is still available and often discounted well below its original price. You lose the dual-colour display and the LINK club recommendations, but you keep the core PinSeeker lock-on, the USGA-conforming slope switch and the BITE magnetic mount that make Bushnell’s rangefinders what they are.
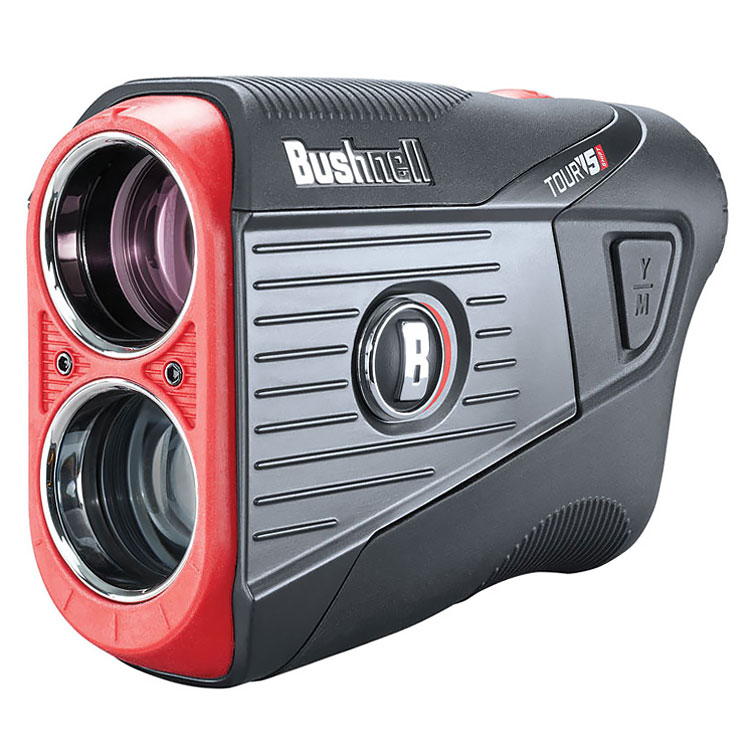
Bushnell Tour V5 Slim Shift Laser Golf Rangefinder

€231.99
in stock
Clubhousegolf.co.uk
Methodology

How We Compiled This Review

We haven’t tested this rangefinder ourselves, so rather than fake a hands-on account, we built this review from independent testing and player feedback published across the golf media, checked against Bushnell’s own published specifications.

  • Accuracy testing

    Compared independent accuracy testing against a calibrated reference distance, including results across multiple current Bushnell models.

  • Cross-checked expert reviews

    Read and cross-checked reviews and long-term test reports from MyGolfSpy, AmateurGolf.com, Plugged In Golf, PlayBetter, Golf Insider UK, Breaking Eighty and GolfLink.

  • Real-world owner feedback

    Checked retailer and forum owner feedback for real-world reliability reports that don’t always show up in press-day reviews.

  • Verified against Bushnell specs

    Checked every technical spec against Bushnell’s official product documentation.

Where sources disagreed, mainly on how much the LINK feature is actually worth to the average buyer, we’ve said so rather than picking the number that flatters the product.

What to look for

What to Check Before You Buy

01
Confirm you'll actually use LINK

The club recommendation feature needs a Foresight or Bushnell launch monitor. If you don’t have one, the V6 Shift gets you most of the same core performance for less.

02
Check your club's slope rules

The physical slope switch is USGA-conforming and tournament-legal, but always confirm your specific competition’s local rules before you play.

03
Decide on battery type

CR2 replaceable means no charging cables, but also no rechargeable convenience. Know which you’d rather deal with.

04
Don't assume newest means necessary

The V6 Shift and V7 Shift are extremely close on raw accuracy. The V7’s real upgrades are the display and LINK, not fundamentally better distance readings.

Frequently Asked Questions

Frequently Asked Questions

Is the Bushnell Tour V7 Shift worth it over the Tour V6 Shift?

If you want the dual-colour display and plan to use LINK club recommendations with a compatible launch monitor, yes. If neither of those matters to you, the V6 Shift offers very similar core accuracy for less money.

What does LINK-enabled mean on the Tour V7 Shift?

It lets the rangefinder pull in your personal club distances from a Foresight or Bushnell launch monitor via the Bushnell Golf app, then show a personalised club recommendation alongside the yardage. It requires a compatible launch monitor to work.

Is the Bushnell Tour V7 Shift legal for tournament play?

Yes, when the physical slope switch is disabled it’s USGA-conforming. Always check your specific competition’s local rules on distance-measuring devices.

What battery does it use?

A replaceable CR2 battery, included in the box. It doesn’t use USB-C rechargeable charging.

How accurate is it?

Bushnell rates it to within ± 1 yard, and independent testing has confirmed it lands inside that tolerance, with tighter average deviation than some other current Bushnell models.

7+ Independent publications referenced
± 1 yard Accuracy tolerance (Bushnell rated)
Player-tested
Independent accuracy testing
Ordering from Clubhouse Golf (UK) to Ireland

No surprise charges at the door: VAT and import duty are included in the price and prepaid. Delivery is €7, free over €120, in 2–4 working days.

Bushnell Tour V7 Shift Laser Golf Rangefinder Black
Clubhousegolf.co.uk
€465.14
Bushnell Tour V7 Shift Laser Golf Rangefinder Black
Bushnell Tour V7 Shift Laser Rangefinder

The Tour V7 Shift is the fastest, most accurate rangefinder Bushnell has made, with a genuinely useful dual-colour display and a tournament-legal slope switch. The LINK club recommendation feature is a real bonus if you have a compatible launch monitor, and an irrelevant one if you don’t. Either way, this is one of the best rangefinders on the market at this price, even if the V6 Shift underneath it remains excellent value for anyone who doesn’t need the extras.

Check current price
Categories
Drivers

Ping G440 Max Driver Review

Explained

Ping G440 Max Driver Review

The Ping G440 Max is the forgiveness-first driver in Ping's current lineup, built for the majority of golfers who lose distance and accuracy to off-centre strikes rather than a lack of raw swing speed.

It replaces the G430 Max, a driver that carried a five-star reputation of its own, so the G440 Max has an unusually high bar to clear. We’ve pulled together launch monitor data, player testing and expert verdicts from across the golf media to work out where it actually delivers, and where the marketing runs ahead of the numbers.

In this article
  • Most forgiving driver in Ping's current range
  • Lower, deeper CG than the G430 for higher launch at the same loft
  • Sits in the mid-to-high pack for outright distance, not the top of it
  • Best fit for mid-to-high handicappers and anyone who needs tighter dispersion
Before You Buy

The Short Version

  • Independent robot testing places the G440 Max below average for pure distance at faster swing speeds, despite strong editorial reviews.
  • Forgiveness and dispersion are where it consistently wins, with testers reporting tighter shot patterns than the G430 Max.
  • The CarbonFly Wrap crown and Free Hosel design combine for a noticeably quieter, more premium sound at impact.
  • It’s one of three head shapes (Max, LST, SFT) plus a newer high-MOI K version, and each is built for a different miss.
8.4
10
Forgiveness 9.5
Sound & Feel 9.0
Distance 7.5
Adjustability 8.5
Value for Money 7.0

Ping G440 Max Driver

The most forgiving head in Ping's G440 range

Ping G440 Max Golf Driver

€616.69
in stock
Clubhousegolf.co.uk

How it performs

The headline change from the G430 Max is a lower, deeper centre of gravity, made possible by the CarbonFly Wrap crown and a shallower, thinner face. In practice, that shows up as a higher launch at the same loft, which means players who were already dialled in on trajectory can drop a degree of loft and pick up ball speed instead.

Where the G440 Max separates itself from most of the field is dispersion. Testers across several publications report noticeably tighter shot patterns than the G430 Max, especially on strikes toward the heel, where the redesigned hosel area lets the face flex slightly more without losing ball speed. That forgiveness is the entire point of the Max head, and by most accounts it delivers.

Distance is the more complicated story. Reviewer sentiment is close to unanimous that this is a genuinely long driver for most swing speeds, but independent robot testing from MyGolfSpy placed it below average for pure carry distance among faster swingers, which sits at odds with the glowing player reports. The likely explanation is the gap between measured performance and how a driver actually plays: a head that inspires a better swing, sounds better at impact and finds the fairway more often will often play longer in the real world than a launch monitor number suggests, even if it isn’t the longest club in a robot test. Worth knowing either way if outright ball speed is your only priority, since the G440 LST is built specifically for that swing.

Sound is one area with almost no disagreement. Several testers rank the G440 range among the best-sounding drivers PING has made, describing a denser, more muted crack at impact rather than the sharper, higher-pitched sound of the G430.

Key specs

Ping G440 Max Specifications

Max (most forgiving in the G440 range)
Head shape
9°, 10.5°, 12°
Loft options
8-position, ±1.5° loft, up to 3° flatter lie
Adjustable hosel
29g, 3-position (Draw / Neutral / Fade)
Back weight
CarbonFly Wrap
Crown
Free Hosel design, thinner forged face
Face
PING ALTA CB Blue (46"); Tour 2.0, Denali Red and Tensei 1K Black also available (45.5")
Stock shaft
Right and left handed
Handedness
€685 (Irish market launch price)
Launch RRP
Best for
Mid-to-high handicappers Golfers who mis-hit off the heel or toe Anyone upgrading from a G425 or G430 who wants tighter dispersion
Not for
Better players prioritising low spin and maximum ball speed Golfers who already hit the fairway consistently and want more distance, not more forgiveness
Pros
  • Best-in-class forgiveness, with genuinely tighter dispersion than the G430 Max
  • One of the best-sounding drivers PING has released, per multiple independent testers
  • Wide, well-regarded stock shaft lineup rather than a single generic option
  • 8-position hosel and movable back weight give real shot-shape control, not just marketing
Cons
  • Premium RRP for what is, at its core, a game-improvement head
  • Below-average distance in controlled robot testing at higher swing speeds
  • Blue/chrome colourway is polarising and won’t suit every eye
  • Players chasing outright ball speed are better served by the G440 LST

Which G440 driver should you actually buy?

This is where most reviews stop short, and it matters more than the headline verdict. The G440 range isn’t one driver, it’s four distinct heads built for different misses:

  • G440 Max: the all-rounder covered in this review. Most forgiving, easiest to get airborne, best for players who need help finding the fairway more than they need extra yards.
  • G440 LST: lower spin, smaller 450cc head, built for faster swing speeds that don’t need the forgiveness boost. Independent testing has it ranking well for distance among low-swing-speed and mid-swing-speed testers alike, at some cost to outright forgiveness.
  • G440 SFT: draw-biased for players who fight a slice. Testing shows it’s genuinely one of the straightest drivers in its class, though it gives up a little distance to get there.
  • G440 K: the newest addition, PING’s highest-MOI driver yet, aimed squarely at players who want maximum stability above everything else, at a higher price point than the other three.

If you’re not sure which one fits your swing, a proper fitting will settle it faster than any review. But as a rule of thumb: most golfers who read this far are best served by the Max. Want to weigh it against other brands first? Our driver comparison guide runs through TaylorMade, Callaway, Titleist, COBRA and the rest.

Methodology

How We Compiled This Review

We haven’t hit this driver ourselves, so rather than fake a personal testing narrative, we built this review by cross-referencing independent testing and player feedback from across the golf media, then checked every technical claim against PING’s own published specifications.

  • Launch monitor & robot data

    Compared launch monitor and robot-testing data, including MyGolfSpy’s Most Wanted driver testing.

  • Cross-checked expert reviews

    Read and cross-checked player and expert reviews from Golf Monthly, Plugged In Golf, The Hackers Paradise, Golfer Geeks, Golfalot and GolfWRX.

  • Real-world owner feedback

    Checked forum and owner feedback for real-world reports that don’t always match press-day reviews.

  • Verified against PING specs

    Verified every technical spec against PING’s official documentation.

Where sources disagreed, most notably on distance, we’ve said so rather than picking the number that flatters the driver.

What to look for

What to Check Before You Buy

01
Get fitted for loft

The 9°/10.5°/12° spread plus ±1.5° hosel adjustment covers most swing speeds, but the wrong static loft undoes the forgiveness gains.

02
Match the shaft to your tempo

The stock ALTA CB Blue suits a smooth tempo; faster, more aggressive swings usually do better on the Tour 2.0 or Tensei 1K Black.

03
Confirm which head shape you're buying

Max, LST, SFT and K look similar in photos but play very differently. Double-check the listing before ordering.

04
Don't over-index on one distance number

Robot data and real-world play don’t always agree. A driver that finds more fairways will often outscore a slightly longer one.

Frequently Asked Questions

Frequently Asked Questions

Is the Ping G440 Max worth upgrading from a G430 Max?

Only if you’re chasing tighter dispersion or a quieter sound at impact. Testers are fairly consistent that this isn’t a huge distance jump over the G430 Max, so if your G430 is performing well, it’s worth trying before you buy rather than upgrading on spec sheet alone.

What's the difference between the G440 Max, LST and SFT?

Max is the most forgiving and suits most golfers. LST is lower-spin and built for faster swing speeds. SFT adds a draw bias for players who slice. The newer K model prioritises maximum forgiveness above all three.

Is the Ping G440 Max available left-handed?

Yes, PING offers the G440 Max in both right- and left-handed builds.

What loft should I choose?

Most golfers do well starting at 10.5°, with the ±1.5° adjustable hosel used to fine-tune from there. Higher swing speeds or a naturally low ball flight may suit the 9°, while slower swing speeds often benefit from the 12°.

Does the G440 Max actually go shorter than rival drivers?

In MyGolfSpy’s robot testing at higher swing speeds, yes, it ranked below average for pure distance. Real-world player reports are more positive, likely because the forgiveness and launch characteristics help mis-hits keep more of their distance.

8+ Independent publications referenced
37 drivers MyGolfSpy driver test field
Player-tested
Robot-tested data included
Ordering from Clubhouse Golf (UK) to Ireland

No surprise charges at the door: VAT and import duty are included in the price and prepaid. Delivery is €7, free over €120, in 2–4 working days.

Ping G440 Max Golf Driver
Clubhousegolf.co.uk
€616.69
Ping G440 Max Golf Driver
Ping G440 Max Driver

The G440 Max earns its reputation as one of the most forgiving drivers on the market, with genuinely tighter dispersion and one of the best sounds at impact of any current driver. It won’t top a distance leaderboard, and the price reflects its position at the top of PING’s lineup, but for the mid-to-high handicapper this is one of the safest, most confidence-inspiring drivers you can put in the bag.

Check current price
Categories
Trolley Reviews

Best Golf Trolleys for Seniors

Decision moment

Small design choices—handle shape, brake force, folding motion—determine whether a round ends with relief or more pain.

Mid-round, hands go stiff after the uphill walk to the 12th tee: a wrong trolley amplifies pain, a good one preserves independence. Faced with sore joints, weak grip and limited wrist motion, the real decision is not features count but how the trolley interacts with the body.

Prioritise ergonomic details—contoured, thicker grips, low-resistance brakes, single-motion folding—and simple mechanics that minimize torque and repeated fine finger effort. Comfort and intuitive controls reduce wrist strain far more than extras such as app connectivity or built-in coolers.

Quick picks for arthritis-friendly needs
  • PowaKaddy Unisex FX1 Lithium — premium electric trolley with compact lithium battery and one-button controls to eliminate pushing effort.
  • Caddytek Explorer V8 — budget, ultra-light push cart with a simple fold and minimal grip force required.
  • FAZER 3-Wheel — three-wheel stability plus an ergonomic, adjustable handle to lower wrist torque on uneven terrain. (Efficient for balance-focused players.)
Quick picks

Shortlist for arthritis-friendly trolleys

Updated: 1 second ago
EZE Glide Cruise 3 Wheel Golf Trolley White
Easy-push design and soft grip
Soft grip handle Two-stage fold Foot brake
Entry-level — simple easy-push frame, soft grip handle and two-stage fold provide minimal hand force and straightforward brakes for reduced joint strain.
€125.99 Amazon.ie
Check price
Buying checklist

Arthritis-focused buying checklist

01
Drive system & resistance

Decide between electric and very low‑resistance manual trolleys based on pain levels and stamina: motors remove most push/pull effort but add weight and occasional maintenance. For mild arthritis, premium low‑friction push carts can be adequate; for significant joint pain an electric trolley dramatically reduces load on shoulders, wrists and knees.

Look for
Electric motor with smooth start/stop or manual carts with low‑friction bearings.
Avoid
Manual carts with high push resistance or heavy, sticky mechanisms.
02
Handle ergonomics & controls

Handles should be height‑adjustable, cushioned and easy to grip; braking and steering that require one hand or a thumb lever minimize repetitive strain. Controls positioned close to the grip reduce reach and twisting.

Look for
Adjustable, cushioned grip with single‑lever brake or thumb controls.
Avoid
Thin, hard grips or multi‑button/twist controls that require fine dexterity.
03
Weight, folding and setup

Light frame materials and a one‑motion fold reduce lifting and awkward twisting when loading into a car. Confirm the folded dimensions and the force required to collapse and reassemble the trolley in realistic conditions.

Look for
One‑motion fold and low unfolded weight.
Avoid
Multi‑step folding, heavy single‑piece frames, or awkward latches.
04
Stability, wheels & terrain handling

A wide track, stable axle geometry and foam‑filled or puncture‑resistant tyres smooth vibrations that transmit to the body. Three‑wheel designs can be easier to steer but check caster effort and stability on slopes.

Look for
Wide‑track stability, foam or puncture‑proof tyres, good caster design.
Avoid
Narrow wheels, exposed thin tyres, or poor caster alignment.
Controls & Joints

How Controls and Mechanics Affect Arthritic Joints — Quick Q&A

How does handle shape and height influence wrist and thumb pain?

Contoured, padded handles distribute pressure across the palm and reduce pinch grip on the thumb and fingers. Height adjustability prevents repeated wrist flexion or ulnar deviation, which commonly aggravate osteoarthritis in the wrist.

Are electric trolleys always better for arthritis?

Motorized drives reduce pushing and towing effort but add weight and complexity when folding or lifting into a car. For limited grip strength, a lightweight electric with an easy-release battery is preferable to a heavy manual cart.

Do folding mechanisms matter for joint strain?

One‑motion, low‑travel folds cut repetitive strain because they use a single, low‑force motion. Complex multi‑step latches can require awkward grips and twisting that irritate arthritic thumbs and index fingers.

How do wheel setup and steering affect shoulders and elbows?

Stiffer steering reduces corrective wrist torque but increases push force transmitted to shoulders; swivel front wheels improve maneuverability but may demand constant micro‑adjustments. Balance stability against the need for repeated small corrections.

Which parking or braking systems are least taxing?

Foot‑activated parking or drop‑in parking positions minimize finger dexterity and grip strength. Hand‑operated brakes that require pinching should be avoided if finger joints are painful.

Simple pre‑purchase checks to protect arthritic joints

Try before buying. Test these actions in real time:

Grip and hold the handle for 30 seconds; if fingers fatigue quickly, the grip is too small or hard. Operate the fold once; any high‑force latch is a red flag. Push and steer over 20–30 paces; note shoulder and wrist effort. Lift the battery or folded trolley into a mock car boot to verify manageable weight.
Myths vs Facts

Common shortcuts that harm more than help

Myth
The lightest trolley is always best for arthritis.
Fact

Ultra‑light frames can sacrifice stability and require more steering corrections, increasing joint movement and strain.

Why it matters

More corrections mean repetitive micro‑motions in wrists and shoulders, worsening pain over a round.

Myth
Bigger, thicker grips automatically reduce joint pain.
Fact

Oversized grips can force fingers open and increase extensor fatigue; ergonomic shape and cushioning are more effective.

Why it matters

Proper contouring supports the palm and reduces pinch forces that aggravate thumb and finger joints.

Myth
An electric trolley eliminates all joint effort.
Fact

Motors cut pushing effort but add lifting and handling tasks for batteries and heavier frames.

Why it matters

Those extra lifts and heavier folds can transfer strain to hands and shoulders during storage and transport.

Best for
Low-effort mobility Battery-reliant users Ergonomic handle seekers
Not for
Tech-averse players Budget-only shoppers
Pros
  • Powerful motor that removes most pushing force and reduces joint torque
  • Pause/resume speed control keeps one-handed adjustments minimal
  • Height-adjustable soft‑touch handle improves wrist and grip ergonomics
  • Plug ’n’ Play 30V lithium battery offers consistent range and fast swapability
  • Robust metal chassis for stable, low-vibration rolling
Cons
  • Electronics introduce failure points and require basic familiarity
  • Lithium battery increases upfront cost and replacement expense
  • Single LED indicator is less informative than multi‑indicator systems
  • Slightly heavier overall than the most minimal manual trolleys
Premium choice

Delivers the lowest pushing torque in its class through a high‑power motor and simple speed control, easing strain on arthritic joints. The ergonomic handle and stable chassis further reduce compensating stresses. Trade-offs include higher cost, battery weight, and reliance on electronic controls—unsuitable for those who prefer mechanical simplicity or who are uncomfortable with basic electronics.

Buy now
PowaKaddy FX1 Best Overall
Lithium battery Ergonomic handle Low-effort controls

02 Best Value
Caddytek Unisex Explorer V8 Golf Push Cart, Silver

Affordable, easy-fold design

Compact fold Lightweight Ample storage

Low‑effort, no‑frills push cart for budget‑minded golfers. The Caddytek Explorer V8 is a lightweight manual trolley that prioritises ease of pushing and a fast two‑step fold over premium materials or luxury padding. Its simple aluminium frame, adjustable handle and integrated foot‑brake keep controls intuitive for limited‑strength users while folding to a compact package for storage and car boot transport. Consider this among the budget comfortable trolleys for seniors when affordability and low push resistance matter more than long‑term cushioning or heavy‑duty durability.

Best for
Occasional golfers Budget-conscious seniors Carrying light loads
Not for
Daily heavy use Rough terrain play
Pros
  • Very light aluminium frame (under 14 lbs) for minimal push effort
  • Patented two‑latch rapid fold — one motion, compact storage
  • Adjustable handle height and simple foot brake for easy control
  • Integrated storage, scorecard and device holders improve convenience
Cons
  • EVA wheels and thinner frame materials reduce shock absorption and longevity
  • Basic handle lacks advanced ergonomic padding for prolonged walks
  • Foot brake is functional but less refined than premium braking systems
  • Limited warranty and lower resistance to heavy daily use

03
FAZER 3-Wheel Golf Trolley with Easy-Fold Design, Adjustable Straps & Ergonomic Handle

Stable 3-wheel balance on varied terrain

3-Wheel stability Adjustable straps Ergonomic handle

FAZER 3‑Wheel Golf Trolley — Stable 3‑wheel option. Aimed at golfers who need predictable, low‑effort steering and secure bag retention, the FAZER pairs a stable three‑wheel layout with an adjustable, moulded handle and strap system to reduce hand and wrist strain during a round.

Best for
Arthritic golfers Steady‑pace walkers Uneven terrain
Not for
Courses with tight turns Frequent sharp pivots
Pros
  • Three‑wheel geometry reduces small corrective steering inputs and the need for abrupt wrist twists
  • Moulded ergonomic handle spreads grip pressure and limits painful hotspots on arthritic hands
  • Height adjustability lets the push line stay neutral, cutting wrist deviation and forearm torque
  • Adjustable bag straps lock the bag to the frame, preventing sudden load shifts that force corrective turns
  • Lightweight yet sturdy frame lowers push force over long walks
Cons
  • Wider three‑wheel track increases rolling resistance during very tight pivots or on narrow lines
  • Requires larger turning arcs or brief lift‑assists for sharp course manoeuvres
  • Removable wheels and folding joints can need slightly more setup torque

04
EZE Glide Cruise 3 Wheel Golf Trolley White

Easy-push design and soft grip

Soft grip handle Two-stage fold Foot brake

Entry‑level three‑wheel for low‑effort play

The EZE Glide Cruise 3 Wheel is an affordable, no‑frills three‑wheel trolley aimed at beginners and returners seeking minimal controls and light steering. Its easy‑push design and soft‑grip handle keep initial friction low, so getting back on the course is less daunting for arthritic hands.

Pairs well with beginner‑friendly trolleys that are low effort for players prioritising simplicity over advanced features.

Best for
Beginner golfers Returning players Budget‑conscious users
Not for
Frequent heavy use Long‑course rounds
Pros
  • Easy‑push design lowers push effort
  • Soft grip handle for sore hands
  • Two‑stage, one‑motion fold
  • Adjustable handle height
  • Foot brake for straightforward stopping
Cons
  • Basic wheels; limited puncture resistance
  • Lightframe may show wear with heavy use
  • Minimal suspension or added comfort
  • Fewer ergonomic adjustments than premium models
Setup & One‑hand fixes

Step‑by‑step ergonomic setup and one‑hand strap solutions

  • Set handle height and wrist angle

    Stand as during play and set handle so the elbow is ~90°; the wrist should rest neutral when holding the grip. If the trolley has an angled handle option, tip it forward 5–10° to reduce wrist extension.

  • Lock handle angle and use larger knobs

    Tighten clamps with the handle in final position, then replace small thumb screws with T‑handles or oversized soft knobs to reduce pinch force during adjustments.

  • Fit one‑hand strap systems

    Use wide, padded webbing with a quick‑release cam buckle or magnetic snap so a single hand can secure and release the bag. Start with the easy strap solutions for arthritic hands when choosing fittings.

  • Add padded cuffs and enlarged grips

    Attach neoprene padded cuffs around the handle or swap to an oversized foam grip to widen contact area and lower pressure points; closed‑loop cuffs let the hand rest rather than grip continuously.

  • Small retrofits that materially reduce torque

    Fit a short handle extension for leverage, grease fold joints, and install quick‑release strap mounts. Each small change cuts the peak torque required to fold, adjust, or secure the trolley.

Watch a concise demo

Visual learners benefit from a 60–120s demo. Look for videos showing:

One‑hand strap attachment (cam buckle or magnetic snap). Handle height set with elbow at 90°. Changing to oversized knobs and grips.

If available, consult the manufacturer setup video for the chosen model—examples often show strap routing and knob swaps for models with adjustable handles.

Methodology

How recommendations were evaluated

Summarizes the hands-on tests and objective metrics used to judge trolleys for users with arthritis, focusing on effort, ergonomics and reliability.

  • Effort and control

    Measured push/pull force, handle torque, brake force and single‑hand operation time to quantify joint load.

  • Stability and steering

    Assessed static tipping, turning radius, and corrective steering required over varied terrain for reduced wrist strain.

  • Durability and power

    Tested battery run time, recharge cycles, folding mechanism life and strap ergonomics for long‑term low‑effort use.

Metrics combine instrumented measurements (force gauge, battery cycler) with timed practical tests to reflect real‑world rounds.

How recommendations were evaluated

Evaluation prioritized the mechanical and ergonomic factors that directly reduce joint load. Tests included: measured push/pull force with a force gauge; timed one‑hand fold/unfold and strap fastening; handle rotation torque; and on‑course steering corrections on turf and hard paths. For motorized trolleys, battery range and assist responsiveness were logged over repeat 18‑hole simulations to detect performance dropoff.

Maintenance checklist (actionable)

  • Charge schedule: charge lithium packs after each round; avoid leaving at 0% or 100% for prolonged periods. Store at ~40–60% state of charge for long storage.
  • Temperature and storage: keep batteries dry and between 0–25°C when possible; avoid freezing or hot car trunks.
  • Connector and contact care: clean terminals with a non‑metallic brush and protect with dielectric grease.
  • Periodic checks: monthly capacity test (full charge then timed discharge under load) and visual inspection of cables and wheel bearings.
  • Mechanical upkeep: lubricate pivots, inspect straps and brakes, and torque‑check handle fasteners after 10 rounds.

For more in‑depth procedures and service intervals, see the maintenance tips to extend trolley life.

Battery quick rules
Battery care essentials

Never fully drain lithium batteries; charge soon after use.
Store partially charged in a cool place.
Run a capacity check quarterly and replace when capacity falls below ~80% of original.
Keep charging and storage contacts clean and dry.

Buying checklist

Day-of Demo Checklist and Immediate Next Steps

  • One-handed steering: hold the handle with the dominant hand and steer a 20–30 m straight line; minimal corrective wrist torque indicates good design.
  • Folding with minimal lifts: complete the fold from standing without lifting the trolley or bending repeatedly; time the motion and count hand actions.
  • Strap access and bag fit: fasten and release straps one-handed; test pouch and accessory reach with an arthritic grip or padded cuff in place.

Recommended picks. For the lowest sustained effort, choose the PowaKaddy FX1 Lithium—motor assist and an ergonomic handle suit longer rounds and limited joint strength. The FAZER 3‑Wheel is best for maximum steering stability and gentle one‑hand handling on uneven terrain. On a strict budget, the Caddytek Explorer V8 delivers the lightest, simplest fold; the EZE Glide Cruise is a sensible entry-level choice for short rounds.

Demo priorities and buy actions. Run the three tests above plus brake engagement and battery start/resume (for electrics). Confirm return policy, local service/warranty, and request in-store setup with strap fitting before finalizing the purchase.

Categories
Trolley Reviews

Adjusting a Trolley Handle that Feels Too High

Why a too‑high handle matters

A handle set too high elevates shoulders and quickly drains focus and energy.

Halfway through a round, a trolley grip that rides at chest level forces the shoulders upward, shortens posture and lets the forearms overextend — a combination that degrades steering precision and accelerates fatigue. That misalignment increases torque through the arms and prompts compensatory leaning from the lower back and neck, raising the risk of strain over multiple holes.

Three paths follow: use the trolley’s native adjustments (telescoping stems, collars and indexed positions) to find a repeatable height; apply short‑term fixes such as foam sleeves, padded grips or repositioned straps during a round; or pursue permanent remedies — shorter replacement stems, aftermarket adjustable handles or professional modification for a safe, repeatable fit.

Key numbers
  • Ergonomic target: a slight elbow flex of ~10–20°; handle commonly 5–15 cm (2–6 in) below the relaxed elbow.
  • Adjustment ranges: stock telescopes typically change ≈5–15 cm; aftermarket stems can shorten height by ≈10–25 cm.
Checklist

Quick parking-lot checklist

  1. Measure handle and wrist

    On level ground, stand behind the trolley with arms relaxed. Measure from floor to handle top and note wrist alignment while gripping; record the desired height.

  2. Identify adjustment type

    Inspect stem and joint for quick‑release levers, push‑buttons, telescoping collars, set screws or expander bolts; note whether adjustment is external or internal.

  3. Check obstructions and damage

    Look for dirt, corrosion, bent stems, jammed cables, missing pins or stripped threads. Gently operate mechanism to detect binding.

  4. Gather tools and documentation

    Bring metric Allen keys (2–6 mm), 8–15 mm spanner or adjustable wrench, flathead screwdriver, penetrating oil, rags, and spare pin/set‑screw. Photograph the current setup and keep a small tray for removed parts.

Lower handle

Lowering each common handle mechanism: step-by-step

  1. Telescoping tube (internal sleeve)

    The outer sleeve should be unlocked (twist collar or push-button) before sliding the inner tube down. Support the upper tube and depress any release button or rotate the locking collar; then lower the inner stem smoothly while watching for cable pinch points and limit stops. After setting height, re-engage the lock and confirm no play or misalignment along the tube length.

  2. Pin-and-hole (detent pin)

    Locate and depress the detent pin or remove the retaining cotter/snap if present, then slide the stem until the desired hole lines up and the pin seats fully. If the pin binds, clean debris from the hole and lubricate lightly; a bent or worn pin requires replacement. Verify the pin passes through the hole completely and that the handle cannot rotate or move under moderate force.

  3. Clamp or quick-release lever

    Open the lever or loosen the clamp bolt just enough to free the stem, then lower to the new position. With quick-release levers, adjust the cam tension (tighten or loosen the adjusting nut) so the lever closes with firm resistance — not so loose that it slips, nor so tight that threads strip. After closing the clamp, inspect for gap between clamp faces and test by applying moderate torsion and downward force.

  4. Threaded collar (screw-style locking collar)

    Rotate the threaded collar counterclockwise to release, holding the tube steady to avoid twisting attached cables. If the collar is seized, apply penetrating lubricant and use a strap wrench or appropriate tool for controlled force; avoid sudden impacts that can damage threads. Once lowered, tighten the collar firmly and check any secondary locknuts or set screws for correct seating.

  5. Mechanism-specific checks and safety test

    Confirm correct cable routing, clearance from the trolley body, and that any stopper rings or O-rings are in place to prevent slippage. Conduct a load test by pressing on the handle with body weight and steering the trolley to ensure the adjustment holds under real use. If movement, binding, or excessive play persists, lock the mechanism and consider component replacement or professional inspection.

If unsure about seized parts or when structural damage is suspected, seek professional repair rather than forcing adjustments.

Short-term fixes

Immediate reversible fixes

Temporary adjustments to improve comfort now

Quick, reversible adjustments

When lowering the handle permanently is not possible, try small changes that change hand position or the bag’s center of gravity. Test each fix in a safe, flat area before extended use.

  • Reposition the load. Move heavier items to lower compartments, or shift the bag back toward the trolley base to reduce lever arm and perceived height.
  • Add a lower hand loop. Secure a short strap or webbing loop around the stem below the main grip and clip it with a locking carabiner. Use it as a secondary handhold for short stretches.
  • Use a grip sleeve or wrap. Slide a foam or silicone sleeve onto the stem below the handle to create a lower, comfortable contact point.
  • Temporary accessory mount. Clip an accessory (small pouch or strap) to the stem below the grip to provide an alternate, lower hand position.

Always verify security and non-slip contact before relying on any temporary measure.

Unsafe DIYs to avoid

Do not cut, drill, weld, or alter structural parts of the stem or handle. Avoid relying on weak adhesives, loose knots, or unstable clamps that can slip under load. Permanent structural changes should be performed by a qualified technician or with manufacturer-approved parts.

Permanent fixes

Long-term modification options

OEM stems, lower-profile handles, and upper‑tube swaps

Legitimate long-term routes

Three durable approaches exist: replace the stem with an OEM or compatible aftermarket unit, fit a lower-profile handle assembly, or perform a full upper‑tube swap to change geometry.

What to verify before ordering parts

Always confirm these measurements and interfaces to ensure fit and safety:

  • Outer/inner tube diameters (mm) and wall thickness.
  • Bolt spacing and hole diameter for clamp plates or hinge brackets.
  • Sleeve length and engagement depth (how far one tube inserts into another).
  • Fastener type (hex bolt, spline, push‑pin) and torque spec if available.
  • Control/electrical interfaces for electric trolleys (pin count, connector type, cable routing).
  • Load rating and material (aluminum vs. steel) to match structural capacity.

Measuring method: use calipers for diameters, a ruler for engagement length, and photograph existing fittings. Confirm spline counts or keyed interfaces visually.

OEM vs aftermarket and installation notes

OEM parts guarantee fit, documented torque specs, and matching materials. Quality aftermarket stems can be acceptable if dimensions and load ratings match. For full swaps, prefer welded or bolted assemblies designed for the model. Always replace locking hardware, use recommended threadlocker, and follow torque values.

Why contact manufacturer or dealer

Manufacturer/dealer approval preserves warranty, ensures structural safety, and provides correct part numbers and installation guidance—critical for preventing failures and liability.

Checklist

Replacement buying & compatibility checklist

01
Required adjustment range

Confirm the replacement allows the same or greater vertical travel than the current handle plus margin for posture. Include any locked positions and micro‑adjust steps.

What to look for
Adjustment span ≥ existing plus 25 mm; positive locking detents
What to avoid
Minimal single‑position stems or adapters that reduce usable travel
02
Stem interface: dimensions and type

Match stem outer diameter, insertion length, clamp/spline type and bolt pattern to the trolley tube or collar. Mismatched interfaces can require custom shims or risk slippage.

What to look for
Exact OD and clamp type (e.g., 25.4 mm, 31.8 mm, splined, tapered) and adequate insertion depth
What to avoid
Assuming ‘close’ sizes fit; generic stems without specified OD/length
03
Handle shape and ergonomics

Select a grip geometry that preserves hand positions and brake access; long‑loop and ergonomic handles change leverage and wrist angle.

What to look for
Comparable grip reach, hand clearance, and brake lever compatibility
What to avoid
Flat or overly wide grips that force altered wrist posture
04
Weight, centre of gravity and dynamic effects

Heavier or longer handles shift the trolley’s CoG and alter steering feel; evaluate with anticipated payload and loaded/unloaded tests.

What to look for
Manufacturer mass data and notes on impact to stability; test-fit under load
What to avoid
Ignoring mass change when swapping to metal or oversized handles
Methodology

Before purchase, record measured travel, stem OD/ID, insertion depth and clamp type on the parts list; cross‑check with manufacturer fit charts and online fit notes. For practical reference, consult the push trolley handle adjustments resource when mapping required travel to available stems. After installation, confirm lock integrity, do a loaded steering test, and retorque fasteners after 24 hours of use.

  • Measure twice, order once

    Verify OD, insertion length and travel with calipers and a straightedge before ordering.

  • Check official fit notes

    Use OEM fit charts, part compatibility lists and user‑reported fitments to catch subtle mismatches.

  • Plan aftercare

    Schedule re‑torque, inspect for slippage after initial use, and keep original part for fallback.

Parts were evaluated by dimensional verification, test-fits on representative frames, and dynamic load checks; always review manufacturer fit notes and community fit reports for model-specific caveats.

Myths & Facts

Common handle-change misconceptions

Myth
Swapping is just one bolt.
Fact

Usually false — interfaces differ.

Why

Different clamp diameters, tapers, or internal routing prevent direct swaps.

Myth
Lowering always reduces stability.
Fact

Not necessarily; small drops help posture.

Why

Large drops affect steering geometry and mass distribution.

Myth
Any change voids warranty.
Fact

Varies; OEM-approved swaps may be allowed.

Why

Manufacturers often permit non-structural parts; verify policy.

Frequently Asked Questions
Handle won't lock after lowering?

Likely clamp misalignment, debris, or stripped threads; clean and re-torque.

Handle feels loose despite torque?

Wrong torque spec or damaged inserts; replace and torque to spec.

Cables bind after stem swap — fix?

Re-route inside stem, lengthen housing, or fit ferrules.

Final steps

Decision Flow and Final Checks

  • Prioritize reversible, low‑risk actions before any structural changes.
  • Match replacement parts to stem diameter, bolt pattern, and torque specs.
  • Schedule simple maintenance: lubricate pivots, inspect fasteners, re‑test ergonomics.

Follow a compact, prioritized decision flow: measure and identify the handle interface, try the built‑in adjustment, apply a reversible temporary fix if necessary, then source OEM or compatible parts — or seek professional help. Maintain pivots, fasteners, and seals; verify fit dimensions and manufacturer guidance to protect warranty and ensure safe operation.

Step List
  • 1) Measure and identify

    Record handle height relative to wrist and note adjuster type, stem diameter, and connector pattern.

  • 2) Try native adjustment

    Operate the intended adjuster fully, check for seized fasteners, and confirm locking mechanisms seat correctly.

  • 3) Apply a temporary, reversible fix

    Use non‑permanent spacers, grip sleeves, or strap reroutes to test comfort before committing to parts.

  • 4) Source OEM or compatible parts

    Match diameter, bolt pattern, and material; prefer OEM for warranty and precise fit.

  • 5) Professional help and final test

    If fit or safety is uncertain, consult a certified technician and perform a road/test walk with full load.

If unsure about fit or structural integrity, stop and consult the manufacturer or a certified repair technician.

Categories
Trolley Reviews

How Long Do Golf Trolleys Really Last?

Repair or replace?

A mid-round motor failure makes the repair-or-replace decision urgent—and costly.

On the 12th green, a limp wheel or an intermittent motor turns a nuisance into a dilemma: repair an aging component or buy a new trolley with a longer warranty and modern features. Stakes are financial (repair bills, resale), operational (reliability during rounds) and safety (battery or wiring faults).

An evidence-based choice balances expected remaining life, repair cost relative to replacement, and parts availability. If repairs approach 40–50% of replacement price, or expected life is under two seasons, replacement is usually preferable. Low-cost, reversible fixes remain worthwhile when parts and warranties support further years of use.

Life expectancy

Lifespan benchmarks by trolley class and battery

Quantitative expectations for wear and replacement timing

Expected service life (benchmarks)

  • Manual trolleys (push/pull, non-motorized): typical service life 5–12 years. Common failure points are wheel bearings, handle joints, and frame corrosion. If structural fatigue or persistent wobble appears before year 5, that is early wear.
  • Electric trolleys (entry to mid-level): average life 3–8 years depending on battery and motor type. Motors (brushed) often last 2–6 years under frequent use; typical battery replacements occur every 2–4 years for lead-based packs.
  • Premium frames and high-end builds: aluminium, chromoly, or carbon components routinely last 8–25 years with normal use. Electronics and batteries still govern overall service life.

Battery chemistry benchmarks

  • Sealed lead-acid (SLA/AGM): ~300–500 cycles or 2–4 years of regular use. Early failure: <200 cycles.
  • Lithium-ion (NMC): ~800–1,500 cycles or 4–8 years. Early failure: <500 cycles.
  • Lithium iron phosphate (LiFePO4): ~2,000–5,000 cycles or 6–12+ years.

Quick judgement rule

Estimate remaining life by percent used: <50% = early, 50–80% = typical, >80% = near end-of-life. Prioritize battery cycle count, motor brush condition, and frame fatigue when deciding repair versus replace.

Subsystem checklist

Component failure profile

Common causes, symptoms, and realistic lifespans by subsystem

A concise breakdown of likely failure modes, observable symptoms, and practical longevity expectations for each major trolley subsystem.

Frame

  • Common causes: corrosion, cracked welds, impact damage, material fatigue from repeated loading.
  • Typical symptoms: visible rust, wobble, misalignment of bag platform, joint play.
  • Expected longevity: 10–20+ years for aluminium or stainless frames with good care; painted steel often 5–10 years.

Wheels/tyres

  • Common causes: UV degradation, punctures (pneumatic), worn tread, warped rims.
  • Typical symptoms: vibration, poor rolling, increased steering resistance.
  • Expected longevity: pneumatic tyres 1–4 years (depending on use); solid/foam-filled 3–8 years.

Bearings and axles

  • Common causes: water ingress, grit contamination, lack of lubrication.
  • Typical symptoms: grinding noise, stiff rotation, heat on axle.
  • Expected longevity: 3–10 years; sealed bearings last longer but are replaceable.

Motor and drivetrain

  • Common causes: worn brushes (if brushed), gearbox wear, belt slip, overheating.
  • Typical symptoms: loss of torque, strange noises, intermittent drive.
  • Expected longevity: 5–15 years depending on design and load profile.

Batteries

  • Common causes: deep discharge, high temperatures, excessive cycle count, poor charging habits.
  • Typical symptoms: reduced range, rapid voltage sag, failure to hold charge.
  • Expected longevity: lead-acid 1–3 years; lithium 3–7 years (or 300–1,500 cycles).

Electronics and controls

  • Common causes: water/condensation, connector corrosion, failed sensors, firmware faults.
  • Typical symptoms: erratic behaviour, error codes, non-responsive remote.
  • Expected longevity: 3–10 years; modular control units often replaceable at moderate cost.
Real-world variables

How terrain, load, storage and climate change real lifespan

Myth
Manufacturer lifespan figures apply equally to every user.
Fact

Those figures assume moderate use on smooth courses; rough terrain, frequent hill work and aggressive riding shorten practical life.

Why it matters

Impacts and sustained high motor draw increase frame fatigue, bearing load and heat—accelerating wear well beyond nominal hours.

Myth
Carrying heavier bags or overloading rarely affects longevity.
Fact

Consistent heavy loads accelerate motor, gearbox and wheel wear and can deform frames.

Why it matters

Increased current draw raises operating temperature and stresses mechanical joints; consult how capacity affects trolley lifespan for capacity thresholds and adjustment strategies.

Myth
Leaving a trolley idle preserves it.
Fact

Long-term storage without proper preparation often causes battery degradation, seal drying and corrosion.

Why it matters

Batteries self-discharge and age faster in heat; seals crack, tyres flatspot, and electronics corrode in humidity—scheduled exercising and climate-controlled storage prolong life.

Maintenance schedule

Practical maintenance schedule — immediate, weekly, monthly, annual, battery care, winterizing

  • Immediate after-round checklist

    Remove grass, mud and grit from frame, wheels and axles; wipe down connectors and dry battery terminals. Quick-check tyre pressure, tighten visible fasteners, and confirm brakes and wheel bearings run smoothly before storing.

  • Weekly tasks

    Clean folding joints and apply a light lubricant to pivots and quick-release levers. Inspect tyres for cuts or embedded debris and top up to recommended pressure; retighten any loose bolts.

  • Monthly tasks

    Perform a drivetrain and motor-attachment inspection: check motor mounts, reduction gears/rollers and bearings for play or wear. Test remote and run the trolley on level ground to detect unusual noises or overheating.

  • Annual service checklist

    Arrange a professional bench service or follow a full strip-and-inspect: electrical connections, motor brushes (if present), bearings, wheel hubs and frame welds. Replace worn tyres, update firmware where applicable, and record parts replaced.

  • Battery-specific care

    Adopt chemistry-specific storage: lead–acid—avoid deep discharge and apply a float charge every 6–8 weeks; lithium—store at 40–60% SOC, use the manufacturer charger, and avoid subzero storage. Cycle-test capacity annually and replace when capacity falls below ~70%.

  • Winterizing steps

    Thoroughly clean and dry the trolley; remove battery and store indoors at recommended SOC and temperature. Cover the trolley with a breathable cover, grease exposed metal, and run the motor monthly to preserve seals and lubrication.

Battery safety
Battery safety and long-term storage

Batteries present fire and corrosion risks if mishandled. Do not charge or store batteries below 0°C or above manufacturer temperature limits.

Disconnect terminals for long storage and keep terminals clean and dry. Watch for swelling, leakage or abnormal heat; dispose of damaged packs at an approved recycling center. Use only the supplied or manufacturer-approved charger to avoid overvoltage and cell imbalance.
Decision guide

When to replace a golf trolley

Clear diagnostic signs and a practical repair-vs-replace rule

Diagnostic signs that indicate replacement

  • Structural failure: bent or cracked main frame, welds separating, or corrosion through load-bearing tubes. These compromise alignment and safety.
  • Battery end‑of‑life: usable capacity below 70% (measured under load) despite conditioning; repeated cell failures or unavailable replacement packs.
  • Major drivetrain failure: gearbox stripped, motor bearing seizure, or repeated motor overheating after proper diagnosis.
  • Irrecoverable electronics: water‑damaged control modules or intermittent faults that resist reprogramming and component replacement.
  • Multiple subsystem failures: concurrent faults in frame, battery, and electronics.
  • Safety hazards: braking failure, steering collapse, or exposed high‑voltage wiring.

Repair vs replace: a practical heuristic

  • If a single non‑structural part fails and repair cost is <30% of new trolley price → repair.
  • If repair cost is 30–60% → compare remaining life, parts availability, and downtime. Favor replacement if trolley age >75% of expected life.
  • If repair cost >60%, two or more subsystems fail, parts are scarce, or any safety hazard exists → replace.
Safety-first threshold

Any structural compromise or braking/steering failure requires immediate replacement, not a field repair. Continued use creates unacceptable injury and liability risk.

Cost per year

Translate lifespan into dollars: annualized cost examples

Compare entry, mid, and premium trolleys including batteries and service

Below are worked examples that convert purchase price, battery replacements and routine service into annualized ownership cost. Use these as a template to compare real offers.

  • Entry model — €250 purchase, expected life 3 years, one battery replacement (€60), annual service €30:
    • Total cost = 250 + 60 + (30 × 3) = €400
    • Annualized cost ≈ €133/year
  • Mid model — €800 purchase, expected life 6 years, one battery replacement (€120), annual service €60:
    • Total cost = 800 + 120 + (60 × 6) = €1,280
    • Annualized cost ≈ €213/year
  • Premium model — €2,500 purchase, expected life 10 years, one battery replacement (€200), annual service €120:
    • Total cost = 2,500 + 200 + (120 × 10) = €3,900
    • Annualized cost ≈ €390/year

Shorter-than-expected life materially raises cost. If the entry model lasts only 2 years (same consumables): total ≈ €370 → €185/year, narrowing the gap with the mid model. A simple break-even check: find the lifespan where (purchase + replacements + service×years)/years equals the competitor’s annualized cost.

Hidden costs to add as contingency:

  • spare parts and unforeseen repairs
  • transport, storage damage, and theft
  • accelerated battery aging from climate/usage
  • lost resale value

For shopping, compare vendors on lifetime warranty terms and include a 10–20% contingency to account for these hidden costs and inflation. See the budget options and expected lifespan for model-specific benchmarks.

Buying checklist

Prioritized checklist for longevity

01
Frame and structural engineering

Durable frames make the largest difference: prefer extruded or tubular aluminum, stainless fasteners, sealed bearings and proven welds; confirm rated load and corrosion protection. Cheap stamped steel, thin sections or flaky plated finishes are common early-failure sources.

Look for
Rigid alloy frame, sealed bearings, clear load rating
Avoid
Thin stamped steel, visible weld defects, poor corrosion protection
02
Motor cooling and drivetrain robustness

Motors and gear trains fail from heat and overload; choose designs with heat-sinking, venting, serviceable gearing, and high torque ratings. Plastic gears, unventilated motors or inaccessible gearboxes shorten life and raise repair costs.

Look for
Ventilated/heatsinked motors, robust gear/belt drives, serviceable housings
Avoid
Enclosed unventilated motors, fragile plastic gear housings
03
Battery chemistry and management

Prefer lithium chemistries with a proper BMS (LiFePO4 if longevity is priority), removable packs, and stated cycle life; ensure good charging documentation. Sealed lead‑acid, no BMS, or glued-in cells reduce usable lifespan.

Look for
LiFePO4 or quality Li-ion, BMS, replaceable pack, cycle rating
Avoid
SLA batteries, no BMS, permanently sealed cells
04
Modularity, parts availability and warranty network

Bolt‑on components, published spare parts lists, and an established dealer/service network simplify repairs and extend life; a multi‑year warranty backed by local service is valuable. Proprietary sealed modules and short warranties increase replacement risk.

Look for
Bolt-on parts, spare‑parts catalogue, 2+ year warranty and dealer support
Avoid
Proprietary sealed modules, no local service, short warranty
Closing checklist

Final checklist and monitoring plan

  • Immediate inspection: tires (pressure/tread), battery voltage/terminals/state-of-charge, frame/welds, fasteners, bearings, electrical connectors.
  • Season starters: verify battery capacity/conditioning; lubricate drivetrain and adjust brakes; clean motor vents and update firmware.
  • Repair vs replace: repair when cost <~30% of replacement and >2 years expected life; replace for cracked frame, motor failure, battery <~70% capacity, or unavailable parts.

Begin with immediate inspections: tires (pressure, tread), battery (open‑circuit voltage, terminal corrosion, state of charge), frame and welds, fasteners, wheel bearings and electrical connectors. Start‑of‑season priorities: verify battery capacity and conditioning, lubricate axles/drivetrain and adjust brakes, clean motor vents and update firmware. Repair if repairs cost under ~30% of replacement and expected life exceeds two years; replace if frame cracks, motor failure, battery below ~70% capacity, or spare parts are unavailable. Cadence: quick post‑round checks, monthly basic maintenance, and annual professional inspection with battery health test.

Categories
Trolley Reviews

Why Your Golf Trolley Keeps Tipping and How to Stop It

Mid‑Round Decision

A tipping trolley creates immediate safety and equipment risk—choices must be fast and clear.

Trolley tilts mid‑hole; clubs swing, bystanders are at risk and shafts or electronics may be damaged. Stop, cut power on electric trolleys, set the brake and clear people before inspection.

Quickly distinguish acute causes (wheel jam, rough catch, sudden load shift) from chronic causes (low tyre pressure, loose axle, persistent imbalance). Acute faults often allow an improvised fix and continuation; chronic faults typically require withdrawal, a spare trolley, or course‑side repair to prevent repeat incidents.

  • Tyre pressure: <20 psi significantly raises tip risk — inflate to manufacturer spec.
  • Wheel/axle play >3 mm (side‑to‑side) suggests bearing or axle failure; replacement needed.
  • If fix can't be made in 10–15 minutes, transfer clubs or withdraw to avoid repeated hazards.
Field protocol

Five‑step field protocol to arrest a tipping trolley

  • Stop

    Halt the trolley and set the brake immediately. For electric models, cut power at the controller or switch off the battery.

  • Secure

    Engage wheel locks or park brake and wedge a chock under the upslope wheel. Improvised chocks: shoe, tee bundle, folded towel, scorecard or phone case.

  • Steady

    Brace the trolley from the high side — one person pushes down on the handle while another holds the base or anchors the frame against a fixed object.

  • Offload

    Remove the bag and heavy items and move them to the low side. Carry clubs downhill if necessary to eliminate the tipping moment.

  • Lower the CG

    Reposition the bag toward the wheelbase, lower its profile (lay flatter), and place heavier clubs low to centralize mass before resuming.

On steep terrain or if stability cannot be regained, do not attempt solo recovery—seek assistance.

Electric‑trolley quick actions

Cut power at the controller or remove/disable the battery immediately.
Engage brake and use a chock; if available, deploy the manual park brake.
Avoid touching a hot or damaged battery.
Use the manufacturer’s manual override or call course staff if the drive motor resists.

Quick diagnosis

Three rapid hands‑on checks to identify the cause

What is the simplest first observation to make?

Stop on firm ground and note when tipping occurs: during acceleration, on slopes, when turning, or immediately after loading. The timing of the tip narrows the likely source — load shift, wheel interaction with terrain, or a structural failure.

Check 1 — wheels and lateral play

Raise the chassis slightly and spin each wheel while holding the hub; any lateral wobble greater than roughly 3 mm or grinding indicates bearing or axle wear. Also confirm tyre inflation: pressures under 20 psi change contact patch behavior and amplify tip tendency on uneven ground.

Check 2 — straps and attachment points

Inspect straps, buckles and anchor fittings for elongation, torn webbing or loose fasteners and load the bag briefly to check for slippage. If the load shifts or anchors slip under a light tug, the problem is packing or attachment; see advice on securing straps for common fixes.

Check 3 — visible chassis, axle and weld inspection

Scan the frame, axles and welds for bends, cracks, missing fasteners or asymmetric alignment; flex the frame gently to reveal hidden movement. Any visible deformation or fractured components points to mechanical failure requiring immediate repair rather than a packing adjustment.

How to interpret the three checks together?

If straps fail but frame and wheels are sound, the issue is packing/attachment; if wheels show play or deflated tyres with intact fittings, wheel/terrain interaction is primary; visible frame or axle damage indicates mechanical failure and mandates withdrawal from play for repair.

Mid‑round fixes

Field adjustments to stop tipping

Tool‑free, immediate changes

Shift weight lower and toward the wheels

Small changes in pack loading greatly affect stability. Move heavy items (balls, water, rain gear) to the lowest accessible pockets or to the base of the bag nearest the trolley wheels. If the bag has multiple compartments, place the heaviest items on the rear side that sits closest to the trolley frame.

Secure and shorten straps

Loose or long straps let the bag swing and create a tipping moment. Tighten the bag‑to‑frame straps by hand so the bag sits snug against the trolley. If excess webbing causes leverage, fold and tuck it under the strap or use a tee or glove to wedge it temporarily.

Lower bag height where possible

If the bag can be mounted one notch lower without tools, do so. Even a small reduction in bag height lowers the center of gravity and reduces tip torque on uneven ground.

Use temporary ballast cautiously

As a last resort, add a small, low ballast (a filled water bottle or a compact rangefinder pouch) tucked low and close to the wheelbase. Keep it centered and secured so it cannot shift.

Limit ballast to temporary, minor mass only; do not overload to compensate for mechanical faults.

When ballast is unsafe

Do not use ballast on soft or wet turf where it will sink and change balance.
Avoid adding weight if the frame, hitch, or wheels show damage or excessive play.
Never exceed the trolley or bag manufacturer’s load limits; heavy ballast can worsen failure.
On steep slopes, remove nonessential weight and avoid ballast that could shift downhill.

Surface causes

Turf, tyres and mud: when the ground is the culprit

How wheels and surface conditions combine to cause tipping

Wheel size, tread pattern, tyre pressure and packed mud interact with turf physics to create tipping moments. Larger-diameter wheels bridge soft patches; narrow or small wheels sink and increase the chassis roll angle. Smooth or mud-packed treads lose effective diameter and lateral bite, while incorrect pressure exaggerates deformation or suction against the turf. If tipping coincides with wet divots or mud build-up rather than obvious chassis faults, the surface is most likely to blame.

Immediate field remedies

  • Clear mud and debris from the hub and tread with a club, glove or stick — restoring effective wheel diameter often stops a tip.
  • Pick a firmer line: move toward higher ground, cart paths or the crown of fairways to reduce sinkage.
  • Make safe pressure adjustments only within the tyre’s recommended range; if tyres are notably underinflated, add air to manufacturer specs. Avoid drastic deflation to gain grip — excessive softness increases instability.
  • If mud recurs frequently, consider a wheel change; opt for mud-friendly wheels to reduce tipping on persistently wet courses.
Serious faults

Mechanical faults that need workshop attention

Bent axles, bearings, hubs, frames and brakes

Mechanical faults that require professional service

  • Bent axle: wheel misalignment, persistent wobble, and uneven loading.
  • Worn bearings: radial play, grinding noise, increased rolling resistance.
  • Loose hub nuts: wheel rocking or risk of detachment.
  • Cracked frame: loss of structural integrity; progressive failure likely.
  • Failed parking brake: trolley will not hold on slopes.

Safe temporary mitigations to get off the course

  • Stop on firm ground, remove the bag and redistribute weight low.
  • Block wheels with wedges, stones or carried chocks; avoid improvised metal inserts.
  • If hub nuts are loose and correct tools available, hand-tighten conservatively; mark position and avoid high speeds.
  • For bent axles or bearings, immobilise the trolley and move it short distances by carrying or using a second trolley/cart if available.
  • Do not weld, drill, or make permanent structural repairs on the course.

Documenting the issue for warranty or workshop follow‑up

  • Photograph multiple angles, close-ups of damage, serial numbers, tyre pressures and a short video of the fault (wobble/noise).
  • Record date, hole/location, ground conditions and recent maintenance.
  • Retain removed parts, receipts and avoid field alterations that void warranty.
Stop if structure or wheel security is compromised

Continued use with a cracked frame, loose wheel, or axle failure risks personal injury. Move the trolley minimally and prioritise safe removal rather than completing the round.

Stability checklist

Buy and service for stability: what to prioritise

  1. Low centre of gravity

    Lowering mass reduces rollover moment; favour trolleys with the bag mount close to the chassis and batteries or ballast mounted beneath the bag. Metal frames with recessed battery trays and low battery compartments consistently outperform high-mounted designs.

    Look for
    Battery and ballast under bag, low bag-mount point
    Avoid
    High-mounted batteries or bag platforms that raise the load
  2. Wide track and longer wheelbase

    Lateral stability improves with greater wheel-to-wheel width and wheelbase; check factory specs and measure if unclear. Adjustable axles, wider tyres, or extended wheelbase options increase the tipping angle on slopes and sidehills.

    Look for
    Wide track, long wheelbase, adjustable axle options
    Avoid
    Narrow stance and short wheelbase designs
  3. Rigid axles and robust hubs

    Stiff axles and sealed metal hubs resist torsion and sudden load shifts; test wheels for play and preferrably choose metal over plastic hubs. Replace worn bearings and bent axles promptly—small play magnifies tipping risk in uneven terrain.

    Look for
    Solid axle, sealed bearings, metal hubs
    Avoid
    Thin stamped axles, plastic hubs, wheels with >3 mm play
  4. Positive parking brake & smart ballast options

    A parking brake that locks both drive wheels under load prevents rollaways; test engagement before play. Prefer integrated, low-mounted ballast solutions and avoid loose external weights that can detach or raise centre of gravity.

    Look for
    Dual-wheel locking brake, integrated low ballast compartments
    Avoid
    Single-wheel or weak brakes, unsecured external weights
Triage

Field triage & fixes

  • Immediate risk assessment

    Halt if heavy lean, wheel detachment, frame crack, or brake failure — these are hard‑stop conditions requiring abandonment.

  • Rapid diagnosis

    Check bag position, wheel play (>3 mm), tyre pressure, mud on tyres, and any visible frame or axle damage.

  • Quick fixes

    Lower the bag, move heavy clubs low/downhill, tighten straps, clear mud, and slightly adjust tyre pressure on firm surfaces.

  • Test & decide

    Apply the brake and walk the trolley slowly ~10 m; if tipping recurs or play persists, secure clubs and call for repair.

Carry a compact pump, a strong strap, and basic spares.

Decision

Continue vs call for help

  • Continue only if stable after the quick test; proceed slowly on firm lines and record the fault for workshop inspection.
  • Abandon and seek professional repair for structural cracks, wheel detachment, persistent tipping, or brake failure.

Pass the short test to continue cautiously. If instability returns or any mechanical defect is evident, secure equipment and obtain professional repair.

Categories
Trolley Batteries

How Golf Trolley Batteries Work: Types, Range, and Safe Use

Decision point

Balance weight, cost and reliability before selecting a trolley battery.

A dead battery mid‑round is the clearest way to see tradeoffs: a lightweight lithium pack may spare the back but risk running out; a cheap lead‑acid option can be heavy and inconvenient to transport. Consider the real costs — purchase price, added luggage weight, and the chance of mid‑round failure — alongside legal and environmental obligations for disposal.

This section maps those tensions to immediate questions that narrow choices: how much weight is acceptable, what guaranteed range is needed for 18 holes, what charging or swap options exist on course, and how will end‑of‑life disposal be handled.

Immediate checks
  • Confirm trolley manufacturer battery compatibility and physical weight limits.
  • Estimate required range from manufacturer specs or past round consumption (ask for Ah or range ratings).
  • Decide charging strategy: spare battery, on‑course charging availability, or quick‑swap capability.
Chemistry matters

Battery chemistries and how they affect play

Which chemistry delivers the right mix of weight, range and reliability

Golf trolley batteries are dominated by two families: lead‑acid variants (flooded, AGM, gel) and lithium‑ion types (most commonly lithium iron phosphate, LFP; some higher‑energy chemistries such as NMC appear in lightweight packs). Chemistry determines the variables that matter on the course: weight, usable capacity, longevity, maintenance needs and risk profile.

Key practical differences:

  • Weight: lithium packs are typically much lighter (often 60–70% lighter for the same nominal capacity), improving trolley balance and handling. Lead‑acid remains comparatively heavy.
  • Usable capacity and depth of discharge (DoD): lead‑acid is usually limited to ~50% DoD to avoid premature wear; LFP safely allows 80–100% usable capacity, so the same nominal amp‑hours yield more real range.
  • Lifespan (cycle life): sealed lead‑acid typically lasts a few hundred cycles; LFP commonly delivers 1,000–2,000 cycles, translating to several years more service under normal use.
  • Maintenance and charging: flooded lead‑acid requires electrolyte topping and regular equalisation; AGM/gel are lower maintenance but still sensitive to long‑term undercharge. Lithium packs need a compatible charger and battery management, but no watering and far less conditioning.
  • Safety and thermal behavior: LFP is the most thermally stable lithium chemistry used in trolleys. High‑energy chemistries like NMC store more energy per kilogram but carry greater thermal risk and typically need more sophisticated protection.

For a deeper cost versus performance comparison, see the real tradeoffs and costs discussion.

Simple selection rule: pick lead‑acid for lowest upfront cost and tolerance for extra weight and maintenance; choose LiFePO4 (lithium) when reduced weight, higher usable range and long life outweigh the higher initial price and require minimal upkeep.

Practical math

Turn a battery spec into a realistic range estimate

A repeatable, calculator‑style method

Start by converting the spec into watt‑hours: Wh = V × Ah. That single number expresses total stored energy and is the basis for any range estimate.

Then follow these steps:

  • Calculate rated Wh. Example: a 12 V, 30 Ah battery = 12 × 30 = 360 Wh.
  • Adjust for usable capacity (chemistry and care): LiFePO4 ≈ 90–95% usable, lead/AGM ≈ 50–70% usable (avoid deep discharge). Also subtract ~5–10% for controller and terrain losses.
  • Choose an average power draw. Typical trolley draws:
    • Flat/light use: 100–150 W
    • Mixed course: 150–250 W
    • Hilly/heavy load: 250–400 W
  • Divide usable Wh by the chosen power draw to get hours of operation.
  • Convert hours to holes: a walking 18‑hole round ≈ 4 hours (≈4.5 holes/hour). Use that pace or replace with personal round time.

Worked examples:

  • Lead‑acid 12 V, 30 Ah → 360 Wh rated. Usable ≈ 50% → 180 Wh. At 150 W → 1.2 hours → ~5–6 holes.
  • LiFePO4 12 V, 40 Ah → 480 Wh rated. Usable ≈ 90% → 432 Wh. At 150 W → 2.9 hours → ~13 holes.

Simple rules of thumb:

  • For a walking player on a typical course, assume ~150 W average draw. That requires ≈600 Wh usable for a reliable 18‑hole round.
  • If the course is hilly or play is slower, increase the assumed draw to 200–300 W and scale capacity proportionally.

For target battery sizes and examples tuned to full rounds, consult the what battery capacity is needed for an 18‑hole round guide.

Charging dynamics

Why charge times differ

How charger characteristics and battery condition set real recharge duration

Charge time is not just battery capacity divided by charger amps. Charger output, the device’s charge algorithm, and the battery’s condition and temperature all control how long a recharge actually takes.

How charger and battery interact

  • Charger output: a higher current (amps) reduces bulk-charge time, but only until the battery reaches the voltage where the charger switches to a taper or absorption stage.
  • Charge algorithm: CC–CV and multi‑stage (bulk/absorption/float) chargers change behaviour as voltage rises; smart chargers and BMS-controlled systems will deliberately slow or stop current to protect cells, extending the final minutes of a cycle.
  • Battery condition: ageing, increased internal resistance, cold temperatures, sulfation or cell imbalance lengthen recharge and raise heat during charging.

A practical rule: initial bulk time approximates battery Ah ÷ charger A, but expect extra absorption/taper time. For worked examples and typical recharge durations, consult the typical charge times guide.

Faster charging is safe only when the battery chemistry, BMS and manufacturer C‑rate permit it; otherwise faster charging accelerates degradation or risks damage.

Match charger to battery chemistry

Using the wrong charger can shorten life or cause failure. Check:

Voltage compatibility and connector fit Manufacturer maximum charge current (C‑rate) That the charger supports the battery’s chemistry and BMS

When in doubt, use a smart charger rated for the battery type and observe temperature during fast charges.

Maintenance habits

Daily and seasonal care to prolong battery life

Practical, repeatable actions for lead‑acid and LiFePO4 packs

Small, consistent habits produce the largest gains in cycle life and reliability for both lead‑acid and lithium packs.

Daily habits

  • Charge timing: adopt simple charging habits — start charging as soon as practicable after a round. Use the manufacturer‑specified charger and avoid repeated deep discharges.
  • State of charge: for lead‑acid, avoid regular discharge below ~50% depth of discharge; for LiFePO4, avoid sustained SOC below 20% and consider charging to 80–90% for frequent play.
  • Temperature management: keep batteries in a shaded, ventilated spot; avoid charging or storing batteries above 30°C. Do not charge Li batteries below 0°C.

Seasonal and storage tips

  • Storage SOC: store LiFePO4 at 40–60% SOC; store lead‑acid fully charged and on a float maintenance charger when possible.
  • Long breaks: disconnect or remove the battery to prevent parasitic drain and check SOC every 3–6 months.
  • Maintenance: top flooded lead‑acid cells with distilled water and follow periodic equalization if recommended by the manufacturer.

Checklist: correct charger, post‑round charge, moderate temp, proper storage SOC.

On-course checklist

Mid‑round battery failure checklist

  • Quick power check

    Confirm switch/remote and status LEDs. If indicator is absent, reseat the battery and retry.

  • Reseat and inspect connections

    Remove battery, clean terminals, reseat; check harness for damage. See common mid‑round failure causes.

  • Check fuses and breakers

    Inspect inline fuse or reset breaker; replace only with the correct spec.

  • Reduce load and retest

    Freewheel, wait 30–60s, then attempt low‑power restart or a short run.

  • Recover or retire

    If power returns with no heat or smell, continue cautiously. If not, retire the battery and return to the clubhouse.

Safety first

Do not short terminals or open sealed batteries.

If hot, swollen or odorous, avoid handling and seek service.

Wear gloves and eye protection; do not improvise jump‑starts.
Safety & compliance

Hazards, transport and disposal (Ireland)

Legal steps and safe handling

Battery packs present two different physical hazards: lead‑acid units are heavy, contain corrosive sulphuric acid and can vent hydrogen; lithium packs store much higher energy per kilogram and can suffer thermal runaway and intense fires if damaged. Damaged, swollen or leaking batteries pose immediate fire and chemical risks and must be isolated.

Transport and road rules differ by chemistry. Lithium batteries are treated as dangerous goods for air and often for courier services and are subject to ADR packing and labelling; lead‑acid packs are hazardous because of acid content but are less restricted for road transport. Practical precautions:

  • Insulate terminals with tape or terminal caps. Keep batteries upright and secure in the boot.
  • Transport in original packaging or a sturdy plastic box; separate chemistries and protect from metal objects.
  • Avoid transporting a visibly damaged battery; contact an authorised carrier for larger shipments.

Irish disposal is regulated: batteries must be recycled through retailers, civic amenity sites or authorised waste contractors. For step‑by‑step local options, consult the official Ireland disposal guidance.

Immediate safety measures

If a battery is damaged or hot:

Isolate it in a cool, ventilated, non‑combustible area. Do not puncture or attempt to charge. Keep away from flammable materials and avoid handling with bare hands. Contact an authorised recycler or emergency services if fire or heavy smoke occurs.
On‑course charging

Alternative charging: car, packs, and solar

Compare practicality, losses and realistic output

Charging options are viable but constrained by power matching, continuous output and conversion losses.

  • Car charging. Vehicle alternators can produce several hundred watts, but direct connection is unsafe and may stress the alternator or trolley battery. Use a proper DC‑DC or mains charger while the engine runs; see specific guidance on charging a trolley battery from a car.
  • Portable power packs/inverters. Expect 10–20% inverter losses and ensure the pack’s continuous output exceeds the trolley charger rating. Match the charger current to the battery’s safe C‑rate.
  • Solar. Realistic yield is limited: roughly 100–150 W peak per m² and 3–5 peak sun hours typical, so plan for several hours to replenish a 300–600 Wh trolley battery.

Quick feasibility check: Battery Wh ÷ available continuous watts (after losses) = required hours. If > available time, option is impractical.

Buying checklist

Prioritised buying checklist

01
Voltage and mechanical fit

Confirm trolley nominal voltage, tray dimensions and connector type before purchase; mismatched voltage or physical fit can damage the controller or prevent installation. Measure the tray and check polarity and terminal style against the trolley manual.

Look for
Exact voltage match and compatible tray/terminal layout
Avoid
Assuming any 12/24 V battery will fit without checking dimensions
02
Usable energy (Wh), not just Ah

Convert specs to Wh (V×Ah) and use realistic usable capacity (account for usable depth-of-discharge) when estimating range; many lithium options advertise Ah but differ in usable Wh. Consult the best lithium battery models and usable capacity for typical usable Wh and value comparisons.

Look for
Published Wh or clear usable % (e.g., 80–95% DoD for lithium)
Avoid
Relying on nominal Ah without adjusting for voltage or usable DoD
03
BMS and charger compatibility

Prefer batteries with an integrated BMS that provides overcurrent, short‑circuit, temperature and cell‑balance protections; verify the charger voltage, current and any communication protocol match the battery. See guidance on choosing a replacement charger to avoid incompatible chargers.

Look for
BMS with balance, temp cutoffs and overcurrent protection; matching charger spec
Avoid
Batteries without BMS or using generic chargers with mismatched voltage/algorithms
04
Weight, warranty and vendor fit

Account for battery weight relative to trolley handling, inspect warranty terms (cycle and pro‑rata policies), and buy from vendors that confirm model fitment and charger pairing; suppliers often list tray-compatible models. For regional options and fit guidance consult the local suppliers listing models that fit.

Look for
Clear warranty terms, vendor fit confirmation, and weight spec
Avoid
Prioritising cost over documented fitment, warranty and support
Action plan

Final checklist and action plan

  • Confirm usable Wh (not just Ah) before purchase.
  • Estimate range with Wh ÷ expected draw and keep a ≥30% reserve.
  • Follow SOC, charge timing and temperature routines to maximise life.

Conclude with an immediate action plan: check chemistry and usable Wh, run the range calculation, adopt maintenance habits, and carry the troubleshooting checklist. Replace or seek professional help when clear failure signals appear.

Check chemistry & usable Wh: verify V×Ah and usable percentage (LiFePO4 typically 80–95%, lead‑acid 50–70%).

Run the range calc: Wh ÷ expected draw (100–400W); apply ≥30% reserve for safety.

Adopt maintenance habits: follow SOC, charge timing and temperature rules; store at partial charge in winter.

Carry troubleshooting kit: spare leads/fuses, basic multimeter and the mid‑round checklist.

Replace/seek help: replace when capacity <70%, persistent BMS faults, swelling or thermal events; consult a pro for BMS or safety faults.

Categories
Folding Trolleys

Folding Golf Trolleys Explained

Travel trade‑offs

Travel decisions hinge on how compact a trolley can get and how much abuse it will tolerate.

After a flight, a golfer may find a wheel cracked and a frame scuffed from fitting a folded trolley into a small trunk. In airports and cars the same bundle faces conveyor belts, tight boot space and rough handling—factors that decide whether the trolley survives a trip.

The trade‑off is clear: lighter, compact designs fold smaller but use thinner tubing and extra hinges, raising damage risk; heavier, stiffer frames resist knocks but add weight and bulk that complicate airline or car transport. Choose based on the constraint most likely to expose the trolley to abuse.

Quick figures
  • Typical folded dimensions: about 60–85 cm long × 35–55 cm wide × 20–35 cm high.
  • Weight ranges: manual trolleys ~4–8 kg; electric models ~8–18 kg.
  • Airline realities: common checked‑bag limits 23–32 kg; maximum linear dimension often ~158 cm—fees and enforcement vary.
Mechanical basics

Mechanical vocabulary and quick checks

Terms, baseline tolerances and simple tests to reveal weak joints

Core components and terms

  • Frame: Main structure; usually aluminum, steel or carbon. Look for tube wall thickness and weld quality — thin-walled tubing saves weight at the expense of fatigue life.
  • Hinge / pivot: The folding joint. Can be a pin, bolt or integrated cam; critical for stiffness and longevity.
  • Locking mechanism: Latch, spring-loaded pin, cam lock or quick-release. Lock engagement depth and positive feedback (a visible click or audible detent) matter.
  • Axle & wheel mounts: Fixed axle, quick-release skewer, or bolt-on. Wheel concentricity and hub bearing type (sealed bearings vs bushings) affect rolling and play.
  • Bearings and bushings: Sealed ball bearings roll smoothly and resist water; bushings are cheaper but wear faster.
  • Cast vs welded joints: Cast parts can be strong but show stress concentrators; welds should be even with no porosity or undercut.

Baseline tolerances and simple in-person tests

  • Lateral play: With the wheel off the ground, wobble should be < ~2 mm at the hub. Anything more suggests loose bearings or sloppy mounts.
  • Hinge play: Apply firm fore-aft and side-to-side force at folded joints. Detectable movement >1–2 mm or audible clunks indicates a weak pivot or worn locking pin.
  • Torsional stiffness: Grip the handle and twist; the frame should resist noticeable flex. Flexible frames fold easier but track poorly on slopes.
  • Bounce test: Push the trolley downwards and release. Persistent oscillation or creaks points to soft joints or poor damping.
  • Visual inspection: Check welds for cracks, castings for hairline fractures, and fasteners for loosening. Look for metal stress marks or paint crazing around joints.

Interpreting manufacturer claims

Terms such as “reinforced hinge” or “heavy-duty” are meaningful only when backed by materials, warranty, and visible construction. Prefer sealed bearings, positive-locking cams, and obvious robust pivots when durability is a priority.

Checklist

Travel‑impact attributes — ranked

01
Folded volume and weight

Most airlines apply strict size and weight limits; a compact, low‑volume fold reduces checked‑bag risk and handling fuss. In car travel, folded dimensions influence trunk fit and ease of loading.

Look for
Small folded footprint and lightweight construction.
Avoid
Bulky folds that remain large even when collapsed.
02
Travel‑case compatibility and wheel protection

A trolley that fits inside a hard travel case or has removable/protected wheels sustains less damage in transit. This matters especially for frequent flyers and checked baggage handling.

Look for
Models that advertise travel‑case fit or removable/guarded wheels.
Avoid
Exposed wheels or non‑removable parts that snag in handling.
03
Frame robustness and locking latches

Durable pivots, reinforced mounts, and positive locks reduce breakage risk and keep the folded pack compact. A flimsy latch is a common failure point under airline/taxi rough handling.

Look for
Reinforced hinges and a secure secondary lock.
Avoid
Single plastic latch without metal reinforcement.
04
Fold speed, tool‑free disassembly and batteries

Quick, repeatable folding and easy wheel/battery removal shorten turnaround and airport processing. Electric trolley batteries bring additional airline restrictions and packing needs.

Look for
Tool‑free wheel release and removable battery with clear specs.
Avoid
Complex teardown or non‑removable batteries with unknown classification.
Travel checklist
Map features to travel profile

Frequent air traveller

Prioritise minimal folded volume and weight. Choose travel‑case compatibility or removable wheels to prevent damage — see the guide to travel‑case compatibility. Ensure removable/declared batteries and a robust fold latch.

Primarily car or local travel

Weight is less critical; favour sturdier frames and larger wheels for rough terrain. Quick‑fold mechanisms and integrated brakes improve convenience over strict compactness.

Decision rule: if flights dominate, treat folded size, case fit and battery rules as non‑negotiable; if driving or club travel dominates, shift priority toward durability, ride quality and speed of use.

Myths

Removable wheels and dismantling: common myths, real facts

Myth
Removing wheels always makes a trolley substantially smaller for travel.
Fact

Wheel removal sometimes reduces one dimension but rarely halves packed volume; hubs, axle housings and spare wheels still need space.

Why it matters

The folded chassis often defines the dominant dimension; wheels add thickness but do not eliminate frame bulk—compare practical trade-offs in trolleys with removable wheels.

Myth
Removable wheels improve reliability and serviceability.
Fact

Extra fasteners and quick‑release fittings introduce additional failure points and alignment risk over time.

Why it matters

Repeated removal cycles wear splines, springs and retaining clips; looseness shows up as wobble or uneven rolling during a round.

Myth
If travelling by air, removable wheels are always worth the hassle.
Fact

Worthwhileness depends on suitcase internal volume, airline linear limits and how often removal is needed.

Why it matters

For many compact folding frames the cart already fits a standard golf travel bag; wheel removal is only justified when a single wheel prevents meeting strict length restrictions.

Simple in‑store test

Perform this quick check before committing:

Remove and refit one wheel three times. Note required tools, force and time. Fit wheel(s) and folded frame into available travel bag or trunk. Confirm real clearance. Push the assembled trolley 10 metres. Listen for clicks and watch for wobble; small play indicates future problems.
Transport rules

Airline and transport checks before booking

  • Check airline dimension and weight limits

    Compare folded trolley length, width and height against the carrier’s checked-baggage and sports-equipment allowances; consult the specific golf trolley airline size limits page for common thresholds.

  • Confirm cabin‑carry allowances

    Some carriers accept compact trolleys as carry‑on while others require gate check or hold baggage; confirm the carrier’s cabin policy and see the guide on whether it may be carried in the cabin.

  • Verify battery and motor rules

    If motorised, verify lithium‑battery packing rules and watt‑hour limits; some airlines ban non‑removable batteries or require advance approval.

  • Measure case and protrusions

    Measure the case external dimensions including wheels, handles and folded wheelbase; allow a margin for case bulge and conveyor tolerances.

  • Confirm fees and handling

    Check sports‑equipment charges, gate‑check procedures and ground‑transport storage limits (rental cars, trains) that may influence trolley choice.

Booking warning

Confirm three concise items before purchase:

Exact folded dimensions, including protruding wheels and handle. Battery type and watt‑hour rating; obtain airline approval if >100 Wh. Applicable fees and whether the trolley will be gate‑checked or checked in.

Photograph the folded trolley beside a tape measure to document dimensions for booking and dispute resolution.

Packing workflow

Step‑by‑step packing for tight boots and suitcases

  1. Prepare and secure moving parts

    Fold the trolley to transport position, retract levers and engage all locks. Remove batteries and store small accessories in a labelled pouch.

  2. Protect pivots and edges

    Pad exposed pivots, bearings and sharp edges with foam, towels or bubble wrap to prevent abrasion during transit.

  3. Orient wheels and place first

    Turn wheels to nest against the frame and set the trolley on its flattest face; for very tight boots follow the fitting guidance for small boots.

  4. Bag, strap and segregate small parts

    Use a padded cover or internal straps; place screws, quick‑releases and tools in sealed, labelled bags and secure them to the frame or case—see the suitcase packing guide.

  5. Final load and test

    Position rigid components against firm surfaces and surround with soft items as buffers. Close the boot or case and give a firm shake; add wedges or straps if any movement remains.

Before departure

Quick checklist

Confirm all latches and locks are engaged. Tape or tie down loose cables and quick‑release pins. Keep a small tool kit and spare fasteners accessible for on‑site adjustments.

Mitigation: reduce damage risk

Preventive measures are the most effective way to avoid repairs. Start by rigidly securing moving parts, padding vulnerable pivots, and using a purpose‑built hard or padded case where possible. Consult the flight protection checklist for recommended materials and airline‑specific packing techniques.

Key actions before travel:

  • Lock or clip latches and tape them if necessary to prevent accidental opening.
  • Pad hinges and protrusions with foam or bubble wrap to disperse impact.
  • Remove loose accessories and store them in a labelled pouch inside the case.
  • Tag the case and note the trolley serial number; take clear pre‑departure photos (folded and unfolded).

Recovery: document and claim

If damage occurs, fast, accurate documentation materially improves claim outcomes. Report damage immediately at the airline or carrier desk and request a written Property Irregularity Report (PIR) or equivalent.

Quick claims checklist:

  • Photograph all damage, the case, and baggage tags—include a time reference when possible.
  • Obtain the carrier’s PIR and a copy of any incident report.
  • Keep receipts for repairs or replacement parts and get at least one written repair estimate.
  • Submit documentation to the carrier and insurer within their stated deadlines; follow the step-by-step claims checklist if available.
  • Escalate with consumer‑protection agencies only after internal appeal deadlines are missed.
Small actions that prevent big claims

Photograph serial numbers and label the case before travel. A few extra minutes of packing and photos often avoids long disputes and improves settlement speed.

Buying checklist

Quick buying checklist by traveller type

  1. Frequent flyers and tournament travellers

    Prioritise a folding trolley built for repeat handling: robust latches, a compact folded footprint under airline limits, and compatibility with hard travel cases to reduce damage in transit. See the detailed advice on choosing a trolley that fits an airline travel case before finalising a purchase.

    Look for
    Hard‑case compatibility, tested latches, conservative folded dimensions
    Avoid
    Fragile hinges, bulky folded profiles
  2. Small‑plane or ultra‑budget travellers

    If the aircraft hold is tiny, choose a purpose‑designed compact model whose folded geometry was intended for tight spaces; packing and weight tradeoffs are expected. Review options in the roundup of compact choices for small planes.

    Look for
    Proven compact fold, light but structurally reinforced frame
    Avoid
    Models that only compress marginally or need extensive disassembly
  3. Car or club‑local golfers

    Durability and quick set‑up matter more than absolute folded size: prefer thicker tubing, protected bearings and easy‑to‑operate brakes for daily use.

    Look for
    Sturdy frame, easy deployment, low maintenance
    Avoid
    Delicate fasteners and removable parts that increase service needs
  4. Travellers who must confirm airline rules

    Always confirm carrier rules and battery restrictions for electric trolleys; specific carriers publish unique limits and fee structures—consult the applicable guidance for Ryanair/Aer Lingus if relevant at their trolley rules for Irish travellers.

    Look for
    Clear battery specs, airline‑friendly dimensions, documented carry/checked allowance
    Avoid
    Unspecified battery type and ambiguous dimensions
FAQs

Quick FAQs before buying or flying

Will it count as checked baggage?

Measure folded dimensions (include wheels/handle) against the airline’s limits; declare batteries and expect possible fees.

Do removable wheels help?

Only if removal reduces packed dimensions significantly; they add failure points—test removal, threads and refit speed before relying on them.

Can electric trolleys fly?

Only if batteries meet IATA/airline rules—prefer removable batteries and carry manufacturer documentation for approval and handling.

Decision checklist

Final decision checklist

  • Measure folded size with wheels and handle; compare to carrier limits.
  • Prioritise footprint, then weight.
  • Prefer secure locks, travel-case fit and compliant/removable batteries.

Measure first. Prioritise the smallest folded footprint over marginal weight savings. For flyers, choose secure locks, a compatible case and battery compliance to minimise damage risk and unexpected fees.

Categories
Push Trolleys

Are Push Golf Trolleys Worth It? A Practical Guide for Irish Golfers

Decision moment

When a wet, hilly midweek round collides with limited time and a sore back, trolley choice becomes urgent.

A 45‑minute midweek tee time, sodden fairways after an Atlantic downpour, a steep climb to the 10th and a stiff hip, this is the instant decision. A golfer faces a concrete trade‑off: save minutes and energy or accept extra cost and storage needs.

The factors that tip the balance are practical. Limited time favours electric trolleys that maintain pace; wet, hilly courses increase the physical burden of pushing; aches or fitness limits can make manual trolleys unsuitable; and storage/cost trade‑offs force choices between compact, inexpensive push models and heavier, pricier electrics with batteries and service obligations. Prioritise typical course terrain, round duration, home storage and budget when deciding.

Quick numbers
  • Typical price: manual push €100–€300; electric €500–€1,500.
  • Typical weights: push 6–9 kg; electric 9–15 kg (folded varies).
  • Electric battery: typically covers 18–36 holes depending on terrain.
Verdict

Quick verdict: checklist and who benefits

  • Quick Checklist Use this short cost–benefit checklist to decide now: walk frequency — if rounds are walked regularly, a trolley typically returns value through reduced fatigue and steadier pace; terrain — hilly courses amplify the benefit; storage and transport — confirm folded dimensions to fit boot or garage; budget — compare mid-range versus premium lifetime costs and expected seasons of use. For quantified fatigue effects, see the evidence on walking fatigue.
  • Best Candidates Senior players or those with joint or back issues who must reduce strain and preserve energy. Regular walkers who play multiple 18‑hole rounds per week and want consistent performance late in the round. Golfers on hilly or links‑style courses where repeatedly lifting or carrying a heavy bag accumulates significant effort.
  • Poor Fits Players who always use motorised buggies — the marginal benefit of a push trolley is negligible. Occasional or social golfers who rarely walk full rounds and prioritise minimal upfront cost and compact gear over comfort.
  • Bottom Line Overall: a push trolley is worth buying when walking frequency, course profile, or health concerns make energy conservation valuable; otherwise prioritise cost, storage and existing transport habits.
Course terrain

How Irish course terrain changes trolley performance

Traction, wheels, steering and slopes explained

How course features affect a push trolley

Wet turf dramatically increases rolling resistance and makes steering heavier; sunk wheels are the most common cause of a trolley feeling like a burden after rain. Read the practical fixes for wet conditions in the guide to trolley wheels sinking in wet grass.

Wheel flotation matters: larger, wider wheels spread load and resist digging, while small narrow wheels sink quickly on soft ground. For a technical look at sizing choices see what wheel size works best for rough fairways.

Steering and front-wheel design determine maneuverability on rutted or tight greenside lines. A swivel front wheel eases turning but can snag in channels; compare options in the swivel versus fixed front wheel analysis.

Slopes and braking affect safety and effort: steep gradients amplify momentum and require reliable slope braking or a low centre of gravity to prevent runaway carts. For models built to handle steep Irish hills consult the roundup of trolleys for steep slopes.

Quick terrain checklist

  • Advantage: firm fairways, broad cart paths, shallow slopes, short rough.
  • Frustration: waterlogged turf, deep ruts, steep hills, narrow or highly undulating lies.
Key mechanics

Wheels and frames: what changes performance

How wheel layout and material shape handling, turf interaction and transport

Wheel configuration: 2‑wheel vs 3‑wheel

The choice between 2‑wheel and 3‑wheel layouts is the single biggest mechanical decision for a push trolley. 3‑wheel trolleys are generally more manoeuvrable: the single front wheel steers easily around bunkers and cart paths and often tracks better over roots and uneven ground. 2‑wheel trolleys present a lower centre of gravity and a wider rear stance, which can feel more stable when standing on steep side slopes or when stopping on a cambered lie.

Practical effects on common Irish conditions:

  • Hills: 3‑wheel models roll up and down with less effort on gentle gradients; 2‑wheel designs resist sideways tipping on steep slopes.
  • Wet turf and ruts: larger, wider wheels and single‑direction front wheels shed mud faster; tyre profile matters more than wheel count.
  • Transport and storage: 2‑wheel trolleys often fold flatter and are lighter to lift into a car boot.

For a technical side‑by‑side of handling differences, see the detailed comparison of two- and three-wheel designs.

Frame material: aluminium vs steel

Frame choice affects weight, corrosion resistance and long‑term stiffness. Aluminium frames are significantly lighter and resist rust—easier for frequent walkers who lift the trolley often. Steel frames are heavier but usually stiffer and less expensive; they tolerate impacts and rough handling better.

Quick trade-offs:

  • Aluminium: light, low maintenance, slightly higher price.
  • Steel: durable, cheaper, adds load when lifting and transporting.

A fuller examination of these trade-offs appears in the frame material breakdown and durability analysis.

Actionable pairings

  • Frequent walkers: choose a lightweight aluminium, 3‑wheel trolley with larger tyres for traction and easy steering.
  • Occasional players: prefer a steel, 2‑wheel model for durability and compact storage; upgrade tyre size if playing on very wet courses.
Common objections

Myths, facts and quick fixes

Myth
Push trolleys are more tiring than carrying or riding.
Fact

Modern three‑wheel, lightweight trolleys reduce effort and use larger leg and core muscles, making walking less fatiguing than carrying a bag.

Quick fix / why

Choose a light aluminium frame and larger pneumatic wheels; adopt a two‑handed steady push and set the handle at hip level to engage the core.

Myth
They get stuck on wet or rutted Irish fairways.
Fact

Wheel diameter, tyre type and front‑wheel design determine traction more than the concept of a trolley itself.

Quick fix / why

Fit wider, treaded tyres, check pressures before the round and use a fixed front wheel on very rutted slopes to improve tracking.

Myth
Trolleys slow play and are hard to store.
Fact

Many models fold quickly and free up energy for faster overall progress through the round.

Quick fix / why

Select a compact folding design and practise the folding sequence at home; remove quick‑release wheels for tight storage.

Myth
Using a push trolley causes back pain or poor posture.
Fact

Back strain usually stems from incorrect handle height or pushing posture, not the trolley itself.

Quick fix / why

Follow simple ergonomics: set handle at hip level, keep a neutral spine, bend the knees and shift grip if fatigue appears—see specific adjustments that reduce hunching for step‑by‑step fixes.

First use & care

First use, folding/unfolding, storage and basic maintenance

  • Initial inspection and first charge

    On first use inspect the frame, wheels, brakes and battery connections. Charge the battery fully before play. Consult the typical setup times and quick tips for realistic expectations.

  • Unfolding the trolley

    Place the trolley on level ground, release the latch and extend the frame until it locks. Raise the handle and rotate each wheel to confirm correct engagement and brake function.

  • Folding and stowing

    Disengage the safety catch, collapse the frame and lower the handle until it locks in the folded position. Secure or store loose accessories in the bag to prevent damage.

  • Daily routine after play

    Remove grass and mud, dry wheels and wipe the frame. Check tyre pressure or wheel bearings and verify brakes before putting the trolley away.

  • Seasonal and long‑term care

    Before long storage, charge then allow the battery to rest at c.40–60% SOC. Clean contact points, lubricate pivots and check fasteners monthly.

Battery note
Battery storage tip

Lithium batteries degrade when left fully charged or fully depleted for months. Store at a moderate charge in a cool, dry place and top up every 8–12 weeks to preserve capacity.

Buying checklist

Ranked checklist: where to spend and where to compromise

01
1. Stability and terrain adaptability

Top priority for Irish courses with wet turf and ruts: choose a chassis and wheel combination that resists tipping and tracks straight. If budget limits the choice, consult the budget reliability guide for durable cheap options and focus spending on front‑wheel design and larger diameter wheels.

Look for
Locked‑swivel front wheel, large diameter wheels, wide footprint
Avoid
Narrow two‑wheel frames or tiny plastic wheels for rough/tacky turf
02
2. Weight, folding and portability

For regular walkers, lightweight aluminium and a compact, tool‑free fold repay every round with less fatigue and easier car handling. Occasional players may accept a heavier steel frame to save money if storage and transport are infrequent.

Look for
Light alloy frame, simple one‑hand fold, compact footprint
Avoid
Clumsy multi‑stage folds or heavy steel without clear transport handles
03
3. Wheels, bearings and long‑term running cost

Sealed bearings and replaceable tyres reduce long‑term expense and maintain roll quality; foam or pneumatic larger wheels perform better on wet ground. Cheap sealed bearings and glued tyres increase maintenance demands and should be avoided where possible.

Look for
Sealed bearings, replaceable tyres, robust axle design
Avoid
Fixed cheap bearings, glued thin tyres
04
4. Accessories, warranty and serviceability

Prioritise a clear warranty and availability of spare parts over extra accessories; holders and scorecard pockets are useful but secondary. Spend on a model with a solid parts network if the trolley will be used frequently; otherwise accept minimalist fittings to save cost.

Look for
Good warranty, available spares, essential clips/straps
Avoid
Expensive add‑on bundles with no parts support
Purchase steps

How to test and secure a push trolley purchase

Practical steps for in‑person trials and warranty checks

Start locally: test models at a specialist golf shop, club demo day or a retailer that allows on‑course trials. Bring the bag or a weight equivalent and insist on pushing across short turf and a gentle slope to see real behaviour.

During trial pushes check:

  • Roll resistance and how much effort it takes over wet and dry turf.
  • Tracking and steering: does the front wheel wander or stay true?
  • Stability on slopes and how the trolley behaves when stopping or turning.
  • Folding, handle height and luggage access — simulate getting it in and out of the car.

Before paying, confirm return and warranty terms — especially restocking fees, proof‑of‑purchase requirements and authorised service points via the returns and warranty policy.

Before checkout

Ask for a short trial agreement: a written 7–14 day trial or conditional return removes most post‑purchase regrets. Verify who pays return shipping and whether wearable parts are covered.

Decision flow

Decision flow and next steps

  • A short, on-course test yields more actionable insight than specifications alone.
  • Prioritise wheel size/traction and frame stiffness before accessories or finish.
  • Strong local service and a fair trial/return policy reduce long-term cost and hassle.

Five‑step decision flow:

Assess fitness and frequency — match trolley weight and handling to typical stamina and rounds per week. Check course fit — confirm wheel type, tyre width and brake performance for fairways, wet turf and slopes. Score features — assign priority to weight, wheel system, stability and folding ease; deprioritise non‑essential extras. Test — conduct a short on‑course trial across two representative holes and a wet patch; note handling and posture. Confirm returns and service — verify trial period, warranty and local spare‑parts/support before committing.

Three practical next actions:

Schedule a 20‑minute demo at a local pro shop or retailer. Build a three‑item shortlist and score each model against must‑have criteria (weight, wheels, foldability). Confirm nearest authorised service point and spare‑parts availability; secure written trial/return terms.
Categories
Electric Trolleys

Electric Golf Trolley Guide: How They Work and What Matters Most

Decision moment

Stop letting spec sheets decide—match trolley features to what the course actually demands.

Standing on the 12th tee with a half‑charged battery and a steep slope ahead clarifies what matters. Marketing highlights motor watts and bells‑and‑whistles; battery range, slope capability, weight and wheel traction are the practical determinants of reliability and convenience on most courses.

Quick numbers
  • Battery: expect 18–36 holes per charge depending on voltage and capacity.
  • Slope: motors typically manage 15–25% gradients; check hill‑start torque.
  • Weight: under 15 kg eases handling; heavier trolleys trade portability for stability.
Core components

Main subsystems and what they control

An electric golf trolley’s performance and longevity come from a handful of interacting subsystems. Reading a spec sheet effectively requires mapping numbers (volts, amps, Nm) to the physical parts that produce speed, hill capability, and durability.

Key subsystems and their effects

  • Drive motor and gearbox — motor torque and gearing set acceleration and hill performance; higher continuous torque and lower gear ratios improve climbs without overheating. For deeper torque detail, see the explanation of motor torque.
  • Battery pack and BMS — voltage determines available power; capacity (Ah) controls range. The BMS and discharge capability (C‑rate) dictate sustained hill performance and battery life.
  • Electronic controller — limits current, implements speed profiles and protection. A conservative controller reduces peak speed and climb power; an aggressive one allows stronger bursts but stresses the battery.
  • Chassis, wheels, tyres, and seals — weight, frame stiffness, tyre diameter and tread influence rolling resistance, traction on slopes, and mechanical durability. Corrosion-resistant materials and IP-rated electronics extend service life.

Evaluate specs by asking which subsystem a listed number actually describes, then judge its practical impact on slopes and longevity.

Practical takeaway

Match torque and controller current limits for hill performance; match battery voltage and discharge rate for sustained power. Robust frame and tyres matter more than small motor power increases for real-world durability.

Power vs torque

Power versus usable torque: choosing the right trolley

Turn specs into on‑course performance

Understanding power versus usable torque

Manufacturers often quote motor power (watts) but usable performance on a slope is determined by torque at the wheel. Torque is what overcomes gravity and rolling resistance; power determines how fast the motor can sustain that torque. Gear reduction and wheel radius convert motor torque into drive torque at the wheel, so identical watt ratings can produce very different hill‑climb ability.

For guidance on selecting motor size for steep terrain, consult a focused discussion of motor power for hilly courses. For tradeoffs in motor design that affect sustained torque and reliability, see the comparison of brushless and brushed trolley motors.

Practical steps to match trolley to course conditions

  • Estimate the loaded mass: trolley + bag + accessories (typical 25–35 kg).
  • Choose the maximum slope to negotiate (expressed as % grade).
  • Calculate required tractive force: mass × g × grade (N). Multiply by wheel radius to get required wheel torque (Nm).

Example: 30 kg on a 10% slope → force ≈ 30×9.81×0.10 ≈ 29.4 N; with 0.15 m wheels torque ≈ 4.4 Nm per wheel. Allow a safety margin (×2–3) for soft turf and start‑stop.

Rule‑of‑thumb trolley selection:

  • Mostly flat: 180–250W motors suitable.
  • Rolling hills: 250–350W recommended.
  • Consistently steep or heavy loads: 350W+ or high‑torque gearbox preferred.

Also prioritise wide, low‑pressure tyres and conservative speed settings to reduce continuous torque demands and preserve battery range.

Motor choice

Brushless vs brushed motors

Key tradeoffs explained

Brushless and brushed motors deliver similar shaft power but differ sharply in efficiency, durability and ownership costs. The distinction matters most when matching trolley performance to frequency of use and course difficulty.

  • Efficiency: Brushless motors are typically 15–30% more efficient. That translates to longer range per charge and less battery stress on long rounds.
  • Heat: Brushless designs run cooler under load because there are no frictional brushes; this improves sustained hill‑climb performance and reduces thermal derating.
  • Maintenance: Brushed motors require periodic brush replacement and inspections. Brushless motors are largely maintenance‑free, often sealed.
  • Cost and repairs: Brushed units have lower upfront cost and simpler repair paths. Brushless systems cost more initially and rely on complex controllers, which can be costlier to fix.
  • Warranty implications: Manufacturers commonly offer longer warranties on brushless motors, but controller electronics may have separate terms.

Recommendation: for frequent, hilly or commercial use, brushless typically yields better lifecycle value; brushed suits infrequent users prioritizing lower purchase price.

Power fundamentals

Batteries, range math, and real‑world endurance

How chemistry, Ah and voltage determine usable energy and what reduces runtime

How chemistry and capacity translate to usable energy

Battery capacity is the product of voltage (V) and ampere‑hours (Ah). That product gives watt‑hours (Wh) — the actual energy available: 36 V × 20 Ah = 720 Wh. Divide Wh by the trolley’s average draw (watts) to estimate runtime in hours, then convert hours to distance or holes.

Different chemistries matter. Sealed lead‑acid (SLA/AGM) is heavy, lower energy density and tolerates simpler chargers but has shorter cycle life. Lithium (Li‑ion, LiFePO4) offers higher energy per kilogram, longer cycle life, and lower self‑discharge; LiFePO4 trades slightly lower energy density for better thermal stability and longevity.

Realistic factors that change endurance

  • Terrain and slope: sustained climbs can double motor draw compared with flat ground.
  • System weight: added gear or a heavier golfer increases rolling resistance roughly in proportion to mass.
  • Speed and stop‑start: higher speeds and frequent stops raise average power.
  • Tyre pressure and surface: underinflation and soft ground increase rolling losses.

For practical conversions and per‑round examples, consult the practical range estimates page.

Charging and storage practices

Charge after use; avoid deep discharge on lithium packs. Store lithium cells at about 40–60% state of charge in a cool, dry place; keep SLA/AGM fully charged during long storage to prevent sulfation. Use the manufacturer’s charger and avoid high‑temperature charging to maximize cycle life.

Charging tip: Recharge immediately after a round, remove batteries for winter storage, and keep Li‑ion cells at ~50% SOC for long‑term storage.

Handling and reliability

Control schemes, ergonomics, and failure modes

How controls feel, what can fail, and what to test at a demo

Control options and how they differ

Electric trolleys use three common control schemes: handle-mounted controls (direct buttons or throttle), programmable controllers with speed/route presets, and wireless remotes that add range and convenience. Compare functional tradeoffs when weighing automation, responsiveness, and simplicity — for a focused comparison see the tradeoffs between remote and manual systems.

Ergonomics and common failure modes

Ergonomics matters: handle height, angle, grip texture, and button placement affect comfort and precision. Readability of any display under sun and wet conditions is critical. Frequent failure modes include: wiring or connector corrosion, button/throttle wear, water ingress into the controller, battery voltage sag under load, and remote interference or latency.

Demo checklist (what to test)

  • Test immediate responsiveness to small speed and steering inputs.
  • Try hill starts and emergency stops several times.
  • Verify button feel and display legibility in bright light and rain.
  • Check real-world remote reach and robustness — consult the realistic remote distances and limits.

For a short demo checklist to bring to a shop, consult this demo buying checklist.

On‑slope safety

Active safety systems

Hill sensors, auto‑braking, park brakes and stability

Active safety systems prevent uncontrolled runs on slopes, reduce descent speed, and preserve stability on undulating courses. Four systems matter:

  • Hill sensors: detect gradient and modulate motor torque to slow descent; in a demo, place the trolley on a slope and check automatic speed reduction.
  • Auto‑braking: engages regenerative or electronic braking when motion exceeds a threshold; test by releasing the handle on a gentle incline — the trolley should stop or slow immediately.
  • Electronic park brake: mechanically locks the drive or applies holding torque; verify by engaging the park brake on an incline and confirming no roll.
  • Stability design: low center of gravity, wide wheelbase, and anti‑tip geometry resist rollovers; test with turns on a slope and a full bag load.

See the detailed explainer on hill sensors and auto-braking for technical background.

During demos, use a moderate slope and a full bag load to replicate real on‑course forces.

Myths

Common Myths About Electric Trolleys

Myth
Electric trolleys damage greens and fairways.
Fact

With wide, low‑pressure tyres and controlled torque they rarely harm turf.

Why it matters

Damage stems from wheel spin on wet slopes; avoid parking on greens. See impact research.

Myth
Heavier trolleys automatically cause more turf wear.
Fact

Contact patch and tyre design set ground pressure; flotation tyres lower wear.

Why it matters

Wide tyres and correct inflation spread load and reduce per‑area pressure.

Myth
Electric trolleys require little upkeep.
Fact

They need battery care, tyre checks, drivetrain cleaning and fastener inspection.

Why it matters

Simple routines prevent corrosion, battery degradation and motor strain after wet use.

Short maintenance checklist

Charge batteries after each round; store cool, partially charged in a dry place.
Rinse mud, avoid high‑pressure jets; lubricate pivots annually.
Check tyre pressure and tighten bolts monthly; test free‑wheel and brakes.

Buying checklist

Step‑by‑step demo checklist

  • Set performance targets

    Define typical round length, bag weight and hill severity; convert to required battery Wh and motor torque before testing. Prioritize models whose published range comfortably exceeds calculated needs.

  • Run the hill and brake tests

    On a representative slope, check climb speed, hill‑sensor response and electronic park braking under load; note any wheel slip or uncontrolled rollback.

  • Verify battery behaviour

    Measure charge time, confirm available capacity at typical load, and check battery fit/lock and replacement options; test discharge under a full‑load, mixed‑slope run.

  • Assess drive system and controls

    Compare motor type (brushless vs brushed), real‑world torque feel and remote/handle ergonomics; validate remote range and control latency during a demo round.

  • Inspect chassis, wheels and service terms

    Check tyre tread and suspension compliance, folding mechanism, corrosion protection and warranty/parts access. For value options, start with the practical picks under €700.

FAQs

Common FAQs

How much torque is enough?

Target 30–40 Nm per wheel on steep courses. More torque lowers motor load and preserves battery life.

How to estimate battery for a full round?

Use Wh math from earlier and add a 20% margin. 300–500 Wh commonly covers an 18‑hole round depending on slope and load.

What to check during a demo?

Verify hill‑brake function, remote fail‑safe, and loaded climb. Inspect battery connectors and tyre condition.

Takeaway

Practical takeaway

  • Torque and brakes first for hilly courses
  • Battery Wh and usable range for long rounds

Prioritize torque and hill‑safety systems for steep courses; prioritize battery capacity and efficient motors for long rounds. Balance weight and tyres to match turf and storage.